
Search Intent Opening
If your robot vacuum fails to locate its charging dock after cleaning, wanders aimlessly instead of returning when battery is low, or ends the mission after 5-15 minutes claiming it’s complete instead of recharging and resuming, you are dealing with docking navigation failure, “charge and resume” logic breakdown, or poor dock placement. Owners searching for “robot vacuum not returning to dock,” “robot vacuum won’t find charger,” or “robot vacuum ends mission early instead of charging” are facing failures in homing algorithms, sensor systems, or software logic.
Search Query Coverage Block
Users commonly describe this as:
- robot vacuum not returning to dock
- robot vacuum won’t find charger
- robot vacuum ends mission early instead of charging
- robot vacuum goes opposite direction of dock
- robot vacuum runs into wall trying to dock
- robot vacuum charge and resume not working
- robot vacuum docks but doesn’t charge
- robot vacuum stops after 10 minutes and says complete
- robot vacuum wanders aimlessly instead of docking
- robot vacuum can’t find home base
- robot vacuum returns to wrong spot
- robot vacuum bumps dock but won’t align
- robot vacuum docking failed error
- robot vacuum won’t go to dock when battery low
- robot vacuum needs manual rescue every time
Why Is My Robot Vacuum Not Returning to Dock?
The most common causes are:
- Dirty or obstructed IR sensors on dock or robot (30%)
- Dock placement with insufficient clearance on sides (20%)
- Corrupted map or software logic failure (25%)
- Weak or dead dock IR emitters (10%)
- Dirty charging contacts preventing proper docking detection (10%)
- Misaligned dock on uneven surface (5%)
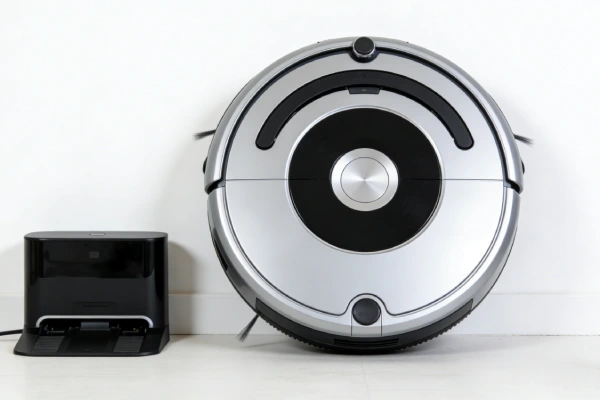
How to Fix Robot Vacuum Docking Failure
Step 1: Clean IR Sensors
- Use microfiber cloth to clean dock IR windows (small dark plastic panels). Clean robot IR sensors on bumper or top.
- Result: Robot detects dock and returns. Failure: Still wanders.
Step 2: Check Dock Placement
- Ensure dock on hard, level surface. Clear 3 feet on both sides, 6 feet in front. No objects blocking.
- Result: Robot docks consistently. Failure: Still fails.
Step 3: Clean Charging Contacts
- Clean dock and robot contacts with isopropyl alcohol and cotton swab. Wipe dry.
- Result: Robot docks and charges. Failure: Docks but no charge.
Step 4: Factory Reset and Remap
- Perform factory reset (button combo until voice prompt). Delete app, reinstall. Set up as new. Run mapping run.
- Result: Robot runs full battery, returns to dock, resumes. Failure: Still ends early.
Step 5: Check Firmware Updates
- In app, check for updates. Install if available. Repeat Step 4.
- Result: Docking restored. Failure: Hardware issue suspected.
Observed Failure Patterns
Pattern 1: Complete Failure to Locate Dock — Wanders or Goes Opposite Direction
- Robot finishes cleaning or battery runs low, but instead of returning to dock, it wanders aimlessly or moves away from dock location.
- Occurs consistently after every cleaning cycle or when battery threshold reached.
- Usually indicates IR beacon failure, dock power loss, or navigation sensor contamination. Robot cannot detect dock signal.
- Does NOT indicate motor or wheel failure (robot moves, just in wrong direction).
Pattern 2: Erratic Docking Navigation — Bumps Wall Repeatedly
- Robot attempts to dock, but runs into same wall or obstacle repeatedly without deviating. When manually placed near dock, it still fails to align.
- Occurs when robot is within range of dock but homing algorithm fails.
- Usually indicates IR sensor misalignment, dock IR emitter failure, or navigation logic corruption.
- Does NOT indicate battery or charging circuit failure.
Pattern 3: Premature “Mission Complete” — No Charge & Resume
- Robot runs for 5-15 minutes, returns to dock, but ends the job and reports mission complete instead of charging and resuming.
- Occurs consistently on every cleaning cycle.
- Usually indicates software logic failure, corrupted map, or that robot incorrectly believes cleaning is finished. Critical failure of “charge and resume” feature.
- Does NOT indicate battery hardware failure (battery may still hold charge).
Pattern 4: Dock Placement Issues — Insufficient Clearance
- Robot can find dock but fails to dock due to physical obstructions or insufficient clearance on sides.
- Occurs when dock is placed in corner, near walls, or with objects within recommended clearance zone.
- Usually indicates installation error, not robot failure. Dock IR signal needs clear path.
- Does NOT indicate robot navigation hardware failure.
Pattern 5: Returns to Dock but Fails to Align
- Robot reaches dock area but repeatedly bumps dock without seating, or docks at wrong angle.
- Occurs when dock is on carpet, uneven surface, or IR emitters are dirty.
- Usually indicates dock placement issue or dirty IR windows.
- Does NOT indicate robot motor failure.
Pattern 6: Docks but Doesn’t Charge (No Electrical Contact)
- Robot returns to dock, docking tone plays, but battery percentage does not increase. Unit eventually dies on dock.
- Occurs after successful physical docking.
- Usually indicates dirty or corroded charging contacts, or dock power supply failure.
- Does NOT indicate navigation failure (robot found dock).
Most Common Root Causes (Ranked by Field Frequency)
1. Dock IR Emitter Failure or Obstruction — 30%
- Why it happens: Dock uses IR beacons to guide robot home. If emitters are blocked, dirty, or failed, robot cannot detect dock location.
- Triggers: Dust on dock IR windows, objects placed in front of dock, dock facing wall, IR emitter failure.
- Confirms: Dock power LED on, but robot wanders or ignores dock. Manual placement on dock works.
- Disproves: If robot docks after cleaning IR windows, obstruction was the issue.
2. “Charge and Resume” Software Logic Failure — 25%
- Why it happens: Software bug or corrupted map causes robot to believe cleaning is complete after short run, bypassing resume logic.
- Triggers: Firmware updates, map corruption, app settings misconfiguration.
- Confirms: Robot runs 5-15 minutes, docks, reports mission complete. Factory reset temporarily fixes.
- Disproves: If robot runs full battery before returning, software logic is functioning.
3. Dock Placement / Clearance Issues — 20%
- Why it happens: Dock requires clear space on sides (typically 1-3 feet) for IR signal spread. Obstructions block signal.
- Triggers: Dock in corner, near furniture, objects stored nearby.
- Confirms: Robot can dock when dock moved to open area. Returns to original placement fails.
- Disproves: If robot docks consistently in open area but fails in original spot, placement issue.
4. Dirty or Obstructed IR Sensors (Robot) — 10%
- Why it happens: IR sensors on robot collect dust, reducing sensitivity to dock signal.
- Triggers: Dusty floors, pet hair, infrequent cleaning.
- Confirms: Robot docks after cleaning sensors. Fails before cleaning.
- Disproves: If sensors clean but robot still fails, dock or logic issue.
5. Navigation Map Corruption — 10%
- Why it happens: Robot loses reference to dock location due to map corruption or incomplete mapping.
- Triggers: Moving dock after mapping, power interruption during mapping, firmware updates.
- Confirms: Factory reset and remap resolves issue.
- Disproves: If issue persists after remap, hardware or logic issue.
6. Charging Contact Contamination — 5%
- Why it happens: Robot docks but doesn’t charge due to dirty contacts. Unit eventually dies on dock.
- Triggers: Dust, oxidation, corrosion on dock or robot contacts.
- Confirms: Robot physically docks, no charging indicator, contacts visibly dirty.
- Disproves: If cleaning contacts restores charging, contamination was the issue.
Rapid Triage Checklist (2-Minute Tests)
1. Dock IR Test
- Place robot 3 feet in front of dock, facing dock. Press dock button on app or remote.
- Result: Robot drives straight to dock and seats → IR working. Wanders or ignores → IR issue.
2. Dock Power Test
- Check dock LED. Place robot on dock manually.
- Result: LED changes state, charging indicator appears → dock power OK. No change → dock power or contacts issue.
3. Contact Cleanliness Test
- Inspect dock and robot charging contacts.
- Result: Clean, shiny → OK. Dark, pitted, green → clean with isopropyl alcohol.
4. Dock Placement Check
- Measure clearance on sides and front of dock.
- Result: 2-3 feet clear on sides, 5-6 feet clear in front → OK. Less space → reposition dock.
5. Charge & Resume Test
- Start cleaning cycle. Observe runtime before return.
- Result: >30 minutes runtime, robot docks, resumes later → OK. <15 minutes, mission complete → logic failure.
Step-by-Step Diagnostic Procedure
Step 1: Dock IR Verification
- Action: Clean dock IR windows (small dark plastic areas) with microfiber cloth. Clean robot IR sensors (typically on bumper or top). Place robot 3 feet in front of dock. Press dock button.
- Expected: Robot drives straight to dock and seats.
- Failure: Robot wanders, ignores dock, or bumps without aligning.
- Decision: If fails after cleaning, go to Step 2.
Step 2: Dock Placement Adjustment
- Action: Move dock to open area with 3 feet clearance on both sides, 6 feet clear in front. Ensure dock on hard, level surface (not carpet). Retest docking.
- Expected: Robot docks consistently.
- Failure: Still fails in open area.
- Decision: If open area works, original placement was the issue. If still fails, go to Step 3.
Step 3: Contact Cleaning
- Action: Clean dock and robot charging contacts with isopropyl alcohol and cotton swab. Wipe dry. Place robot on dock manually.
- Expected: Charging indicator illuminates, battery percentage increases.
- Failure: No charging after cleaning.
- Decision: If charging works manually, docking navigation issue remains. Go to Step 4.
Step 4: Factory Reset and Remap
- Action: Perform factory reset (button combo until voice prompt). Delete robot from app. Reinstall app if necessary. Set up as new device. Run full mapping run (not cleaning). After map completes, run cleaning cycle.
- Expected: Robot runs full battery, returns to dock, resumes after charge if needed.
- Failure: Still fails after remap.
- Decision: If reset resolves, map or software corruption was the issue. If persists, go to Step 5.
Step 5: Firmware Update Check
- Action: In app, check for firmware updates. Install if available. After update, repeat Step 4.
- Expected: Docking and resume functions restored.
- Failure: Still fails after update.
- Decision: If update resolves, firmware bug was the issue. If persists, hardware failure suspected.
Step 6: Hardware Component Test
- Action: Inspect dock IR emitters (use phone camera in dark mode—IR LEDs should glow faintly). Check robot IR sensors for physical damage.
- Expected: IR LEDs visible through camera. Sensors clean, no cracks.
- Failure: No IR glow, or sensors damaged.
- Decision: If dock IR dead, replace dock. If robot sensors damaged, main board or sensor module replacement required.
Why Does My Robot Vacuum Keep Missing the Dock?
Cause: Obstructions or dirty IR sensors can prevent the robot from detecting the dock.
Fix: Clean the dock’s IR sensors, move the dock to a clearer space, and make sure there are no obstructions.
How Can I Fix a Robot Vacuum That Stops Its Mission Early?
Cause: A software bug or map corruption can cause premature mission completion.
Fix: Perform a factory reset, remap the area, and check for firmware updates.
Why Does My Robot Vacuum Bump into the Dock but Fail to Align Properly?
Cause: The dock may be on an uneven surface or too close to walls.
Fix: Ensure the dock has at least 3 feet of clearance on all sides and is placed on a hard, level surface.
Physical Layer Inspection
- Dock IR Windows: Small dark plastic panels. Look for dust film, scratches, cracks.
- Robot IR Sensors: Typically located on bumper or top. Look for dust buildup, cracks, impact damage.
- Charging Contacts: Check for oxidation (dark/green), pitting, corrosion. Clean with eraser or isopropyl alcohol.
- Dock Power Supply: Inspect for swollen casing, burn marks, frayed cord.
- Dock Placement Surface: Ensure dock on hard, level floor. Carpet can cause misalignment.
- Obstructions: Look for furniture, curtains, objects within 3 feet of dock sides or front.
Reset and Recovery Behavior Mapping
- Normal Dock Reset: Unplug dock 30 seconds, reconnect. LED returns to standby.
- Normal Robot Reset: Press power button 10 seconds → LED flashes → unit restarts. Retains maps.
- Factory Reset (Hard): Press and hold button combo (varies by model) 10-20 seconds → voice prompt → erases maps, WiFi, returns to setup mode.
- Failed Reset (Logic): After factory reset, robot still fails to dock or resume. Indicates hardware or persistent software issue.
- Failed Reset (No Voice): Buttons pressed, no response. Button failure or board issue.
False Fixes That Do Not Work
- “Move dock closer to where robot stops”: If IR signal is weak, moving dock may help, but root cause is obstruction or emitter issue.
- “Let it run longer to figure it out”: If navigation logic is broken, more time won’t fix it.
- “Ignore early mission complete”: Robot will continue to end jobs prematurely, leaving house uncleaned.
- “Use a different power supply”: Non-OEM supplies may not provide correct voltage or current for docking detection.
- “Place dock on carpet for cushion”: Carpet causes misalignment and IR signal scatter.
Confirmed Fix Scenarios
Scenario A:
- Symptom: Robot wanders aimlessly, ignores dock. Dock IR LEDs not visible through camera.
- Confirmed Cause: Dock IR emitter failure.
- Fix: Replace dock.
- Verification: Robot returns to dock consistently after replacement.
Scenario B:
- Symptom: Robot runs 10 minutes, returns to dock, reports mission complete.
- Confirmed Cause: “Charge and resume” software logic failure, map corruption.
- Fix: Factory reset, delete app, remap house.
- Verification: Robot runs full battery, returns, resumes after charging.
Scenario C:
- Symptom: Robot reaches dock area but repeatedly bumps without aligning.
- Confirmed Cause: Dock placed in corner with insufficient clearance.
- Fix: Move dock to open area with 3 feet clearance on sides.
- Verification: Robot docks on first attempt.
Scenario D:
- Symptom: Robot docks but doesn’t charge; contacts dirty.
- Confirmed Cause: Oxidized charging contacts.
- Fix: Clean contacts with isopropyl alcohol and eraser.
- Verification: Charging indicator illuminates; battery percentage increases.
Scenario E:
- Symptom: Robot worked before firmware update, now fails to dock.
- Confirmed Cause: Firmware bug affecting docking logic.
- Fix: Install latest firmware update (if available), or roll back via support.
- Verification: Docking restored after update.
Scenario F:
- Symptom: Robot docks but resumes in wrong room or doesn’t resume at all.
- Confirmed Cause: Map corrupted after moving dock or furniture.
- Fix: Delete map, run new mapping run.
- Verification: Robot resumes correctly after recharge.
Post-Fix Verification Checklist
- Docking Test: Robot returns to dock and seats correctly after full cleaning cycle.
- Charge & Resume Test: Robot runs >30 minutes, returns when low, charges, resumes to complete remaining area.
- Manual Dock Test: Press dock button from 10 feet away; robot returns within 30 seconds.
- Contact Cleanliness: After several cycles, contacts remain clean with no visible oxidation.
- Dock Placement: Dock has 3 feet clearance on sides, 6 feet in front, no obstructions.
- Map Integrity: After mapping run, all rooms appear correctly; dock location marked accurately.
Escalation Threshold
Dock Replacement Required When:
- IR emitters not visible through camera after cleaning.
- Dock LED on but robot never detects dock even in open area.
- Physical damage to dock housing or contacts.
Robot IR Sensor Replacement Required When:
- Sensors visibly cracked or damaged.
- Robot detects dock inconsistently even after cleaning and dock replacement.
Main Board Replacement Required When:
- Factory reset and remap fails to restore charge & resume logic.
- Robot ignores dock consistently despite functional dock and clean sensors.
- Multiple firmware updates fail to resolve.
Factory Repair Required When:
- Persistent charge & resume failure after all software resets.
- Hardware damage to charging circuit.
- Out of warranty with repair cost below replacement.