
Projector problems usually fall into three categories: image quality issues, reduced brightness, and overheating. A projector may produce a blurry picture, become noticeably dimmer, display unusual colors, make excessive fan noise, or shut off unexpectedly.
The key to effective projector troubleshooting is identifying the symptom before assuming a component has failed. A blurry image does not automatically mean the lens is damaged, a dim picture does not always mean the lamp needs replacing, and an overheating warning does not necessarily indicate a failed fan.
This guide explains how to diagnose common projector problems, which checks you can safely perform yourself, and when professional repair is necessary.
Quick Projector Troubleshooting: Identify the Problem First
Start by identifying what the projector is doing. Different symptoms point toward different possible causes.
- Projector blurry: Check focus, lens condition, projection distance, image alignment, and input resolution.
- Projector image too dim: Check brightness settings, picture mode, light-source condition, lens cleanliness, and ventilation.
- Projector overheating: Check air intake, exhaust clearance, filter condition, room temperature, and fan operation.
- Projector shuts off after a few minutes: Check temperature warnings, airflow, power connections, and the operating conditions specified in the manual.
- Projector making unusual noise: Determine whether the sound comes from normal cooling airflow or a potentially failing fan.
- Projector image color problems: Compare the projector’s internal menu with the connected video source to help isolate the problem.
Before troubleshooting, turn the projector off and allow it to cool if it is unusually hot. Disconnect power before cleaning any external parts or removable filter. Never open the projector housing to inspect internal electrical or optical components.
If you notice smoke, a burning smell, electrical crackling, or visible damage, stop using the projector and arrange professional inspection.
How to Fix a Blurry Projector Image
A blurry projector image can result from incorrect focus, lens contamination, unsuitable projection distance, image alignment, or an input signal problem. The location and pattern of the blur can help narrow down the cause.
1. Adjust the Focus Correctly
If the entire image looks soft, start with the focus control.
Turn the focus ring or use the electronic focus adjustment, depending on the model. Display a menu or a screen containing clear text so you can judge sharpness more accurately.
If the projector won’t focus even after repeated adjustments, possible causes include:
- The projector is outside its supported projection distance.
- The focus mechanism is not moving correctly.
- The lens or internal optical assembly has a problem.
- The image is being softened by the source resolution or scaling.
Do not force a mechanical focus ring if it feels stuck. Forcing it can damage the adjustment mechanism.
2. Check the Projection Distance and Alignment
A projector must be positioned within its supported throw-distance range. If it is too close or too far from the screen, the image may not focus correctly.
Check the manufacturer’s projection-distance specifications. Also make sure the projector is facing the screen as directly as practical.
Excessive keystone correction can reduce effective image resolution and make the picture look softer. If possible, physically reposition the projector and reduce digital keystone correction.
If your projector supports lens shift, use it to adjust image position without unnecessarily tilting the unit.
3. Clean the Projector Lens
Dust, fingerprints, and smudges on the lens can reduce image clarity and contrast.
For projector lens cleaning:
- Turn off the projector and allow the lens area to cool.
- Use a clean, soft lens cloth designed for optical surfaces.
- Remove loose dust gently before wiping.
- Avoid abrasive materials, household cleaners, and excessive pressure.
- Follow the manufacturer’s cleaning instructions.
Do not spray cleaning liquid directly onto the lens. Some lens coatings can be damaged by unsuitable chemicals.
4. Diagnose Projector Blurry on One Side or Around the Edges
If the center of the picture is sharp but one side or the edges remain blurry, the problem may involve image alignment, lens characteristics, projector positioning, or the screen surface.
Check the following:
- Is the projector level and properly aligned with the screen?
- Is the screen flat rather than curved or uneven?
- Does the blur remain in the same location when displaying the projector’s own menu?
- Does the projector have lens shift or focus settings that need adjustment?
A projector blurry on one side may have an optical alignment problem, but this symptom alone does not confirm lens damage.
If the center is sharp but the corners remain consistently out of focus after correct positioning and focus adjustment, the lens or internal optical system may need professional inspection.
5. Check the Input Resolution and Video Source
A low-resolution source displayed on a large screen can look blurry even when the projector is functioning normally.
Check the source device’s output resolution and confirm that the projector is receiving a supported signal. Test another HDMI cable, input port, or video source if available.
If the projector’s menus appear sharp but the connected video looks blurry, investigate the source device, cable, resolution, or image-processing settings before assuming the projector is defective.
How to Fix a Dim Projector Image
A dim projector image can make text difficult to read and reduce picture detail, especially in a bright room.
The cause may be an incorrect picture setting, a dirty optical surface, restricted airflow, or a deteriorating light source. A projector image suddenly dim is different from a gradual reduction in brightness and should be investigated accordingly.
1. Check Brightness and Picture Settings
Start with the projector’s picture menu.
Check whether:
- Eco or low-power mode is enabled.
- The selected picture mode reduces light output.
- Brightness or light-output settings have been changed.
- Dynamic contrast or automatic light adjustment is affecting the image.
- The projector is using a power-saving setting.
Eco mode can reduce brightness to extend operating time or lower power consumption. If the projector brightness is too low, compare the available picture modes and select an appropriate setting.
Do not assume that increasing the brightness control will restore a worn-out light source. Image brightness and light-source output are not the same thing.
2. Inspect the Lens and Air Filter
A dirty lens can reduce the amount of light reaching the screen. Clean the external lens using the manufacturer’s recommended method.
Some projectors also use air filters that collect dust. A projector filter clogged with dust may restrict airflow and contribute to overheating or reduced performance.
If the filter is designed to be user-serviceable:
- Turn off and unplug the projector.
- Allow it to cool completely.
- Remove the filter according to the manual.
- Clean or replace it using the specified method.
- Reinstall it securely before operating the projector.
Not every projector has a removable or washable filter. Do not wash a filter unless the manufacturer explicitly permits it.
Cleaning a filter can improve airflow, but it does not necessarily restore brightness if the light source or internal optical components have deteriorated.
3. Check Whether the Projector Lamp Is Aging
On lamp-based projectors, brightness can decline as the lamp accumulates operating hours.
Check the lamp-hour information in the projector menu. Compare it with the manufacturer’s specified lamp-life guidance.
A projector lamp dim condition may indicate normal aging, but lamp hours alone cannot confirm that the lamp has failed. Picture settings, dust, optical contamination, and other faults can produce similar symptoms.
If the projector displays a lamp warning or the lamp has reached the manufacturer’s replacement guidance, use the correct replacement lamp specified for the model.
Do not touch the lamp glass or attempt to dismantle the lamp assembly unless the manufacturer specifically provides a user-replacement procedure. Lamp modules can become extremely hot and may contain components that require careful handling.
4. Diagnose Sudden Brightness Loss
If the projector image suddenly dim, compare several conditions:
- Does the internal menu also look dim?
- Does the brightness change after the projector warms up?
- Does the image flicker or become unstable?
- Is there a lamp or temperature warning?
- Did the picture mode or light-output setting change?
If the internal menu and every input source are equally dim, the issue is more likely to involve the projector itself than the external video source.
A sudden loss of brightness can have several causes, including light-source problems, power-related faults, or internal optical issues. A technician may need to inspect the unit to identify the actual cause.
5. Consider the Screen and Room Lighting
A projector can appear dim even when it is operating normally.
A larger screen spreads the available light over a greater area. Ambient light can also reduce perceived contrast and make the picture look washed out.
Before replacing a lamp or arranging repairs, test the projector in a darker room and compare the image on a suitable screen.
How to Fix Projector Overheating
Projectors generate heat during operation. Their cooling systems use fans, ventilation openings, and sometimes filters to move heat away from internal components.
If airflow becomes restricted or the cooling system develops a fault, the projector may display a temperature warning, increase fan speed, or shut down to protect itself.
1. Check for Blocked Ventilation
Projector ventilation blocked by walls, cabinets, curtains, or other objects can prevent hot air from escaping.
Check the projector’s air intake and exhaust openings. Make sure:
- The intake and exhaust vents are not covered.
- The projector has the clearance specified in the manual.
- Hot exhaust air is not being drawn directly back into the intake.
- The projector is not operating inside an unsuitable enclosed space.
- The surrounding room temperature is within the manufacturer’s operating range.
Do not place objects directly against ventilation openings. Improving ventilation is often the first useful step in projector overheating troubleshooting.
2. Clean the Projector Air Filter
A dirty filter can reduce airflow and make the cooling system work harder.
To clean a projector air filter, follow the model-specific instructions. Some filters can be cleaned, while others must be replaced. Some projectors do not have a user-accessible filter at all.
Never operate the projector with a required filter removed. Do not insert tools or cleaning equipment deep into the ventilation openings.
3. Check Whether the Projector Fan Is Working
The projector fan moves heat away from internal components. A projector fan not working, running irregularly, or producing unusual mechanical noise may indicate a cooling-system problem.
Look for these warning signs:
- The projector becomes unusually hot.
- A temperature warning appears.
- The fan makes grinding, rattling, or scraping sounds.
- Airflow from the exhaust is noticeably weaker than normal.
- The projector repeatedly shuts down during use.
Some models automatically adjust fan speed according to temperature and operating mode. A fan that becomes quieter or changes speed is not necessarily defective.
If the fan appears to stop while the projector is hot, or the unit displays a cooling warning, stop using it and arrange inspection. Do not open the housing or attempt internal fan-voltage testing.
4. Diagnose a Projector Fan Making Noise
A projector fan making noise can be caused by normal high-speed operation, accumulated dust, vibration, or a mechanical problem.
First, check whether the noise occurs only in high-brightness mode or when the projector is operating in a warm room.
If the noise is new, unusually loud, or accompanied by overheating, the fan or cooling assembly may need professional inspection.
Do not insert objects into the vents to stop or test the fan. Do not lubricate internal fans unless the manufacturer specifically provides an approved maintenance procedure.
5. Understand Why a Projector Shuts Off After a Few Minutes
A projector shuts off after a few minutes for several possible reasons:
- Internal temperature exceeds the permitted operating range.
- Air intake or exhaust is restricted.
- A cooling fan is not operating correctly.
- The power connection is unstable.
- A lamp or other component has triggered a protection condition.
- An internal electrical or control fault is present.
Check the warning indicators and operating instructions. If the projector displays a temperature warning light, allow it to cool and inspect the external ventilation openings.
If it repeatedly shuts down after restarting, do not keep cycling the power. Repeated operation under a fault condition can cause additional damage.
If the projector shuts down without a temperature warning, the cause may be unrelated to cooling and may require electrical or control-system diagnosis.
Other Projector Image Problems
Not every picture problem is caused by focus, brightness, or overheating. Some symptoms require a different diagnostic approach.
Projector Yellow Spot on Screen
A projector yellow spot on screen may result from an internal optical issue, dust or contamination in the light path, or deterioration of an optical component.
First, check whether the spot appears on the projector’s internal menu as well as on external video sources.
If the spot appears on every image, the issue is likely within the projector. If it appears only with one source, check the source device and video signal.
Do not assume that a yellow spot automatically means a polarizer or LCD panel has burned out. Internal optical diagnosis requires model-specific knowledge and appropriate service procedures.
Uneven Brightness or Dark Areas
If one area of the image is darker than another, possible causes include:
- Uneven light output.
- Lens or optical contamination.
- Internal optical deterioration.
- Screen surface problems.
- Image-processing or source-related issues.
Test a plain white image and the projector’s internal menu. If the unevenness remains across different sources, professional inspection may be necessary.
Projector Image Color Problems
Incorrect colors, a yellow or green tint, or unusual color patches can originate from the source device, cable, picture settings, or internal imaging components.
Try another input source and check the projector’s color settings. If the internal menu also shows incorrect colors, the problem is more likely to be inside the projector.
Persistent color distortion may require inspection of the optical engine, imaging panel, or associated electronics.
Flickering or Intermittent Image
A flickering image may be caused by an unstable video connection, incompatible signal settings, a light-source problem, or an internal electrical fault.
Check the cable and input source first. If the flickering continues across different sources, stop treating it as a simple connection problem and arrange further diagnosis.
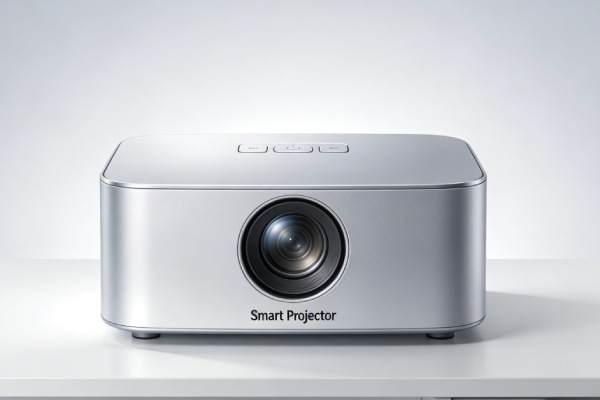
Projector Troubleshooting by Light Source Type
Different projectors use different light sources. Their maintenance requirements and common failure symptoms are not identical.
Lamp Projectors
Traditional lamp projectors use a replaceable high-intensity lamp.
Common issues include:
- Gradual brightness reduction.
- Lamp warning indicators.
- Failure to start or maintain stable illumination.
- Lamp-related shutdowns.
Check the lamp-hour information and replacement guidance for the specific model. If replacement is necessary, use a compatible lamp module and follow the manufacturer’s instructions.
LED Projectors
LED projectors use light-emitting diodes rather than traditional replaceable projection lamps.
They generally do not require routine lamp replacement in the same way as lamp-based models. However, brightness can still decline over time, and other components can fail.
If an LED projector becomes unusually dim, check the settings, ventilation, and external optical surfaces first. Persistent brightness loss may require professional inspection of the LED light source or its power circuitry.
Laser Projectors
Laser projectors use a laser-based light source and may have different service requirements from lamp and LED models.
A laser light source does not mean that the entire projector is maintenance-free. Cooling, optical cleanliness, power electronics, and internal components still affect performance.
If a laser projector develops sudden brightness loss, unusual color changes, or repeated overheating warnings, consult the manufacturer’s service guidance rather than attempting to repair the internal light-source assembly.
Projector Lamp vs. Laser Light Source: What Is the Difference?
The main practical difference is how the projector generates light and how the light source is maintained.
Lamp projectors commonly use replaceable lamp modules. LED and laser projectors generally use integrated light-source assemblies with different service procedures.
Do not apply lamp-replacement instructions to LED or laser projectors. Identify the light-source type before ordering parts or attempting maintenance.
Projector Maintenance to Prevent Image and Cooling Problems
Regular maintenance can reduce avoidable problems involving image clarity, brightness, and cooling.
Keep the lens clean. Remove external dust and fingerprints using an appropriate optical cleaning cloth.
Maintain ventilation. Keep the air intake and exhaust clear, and provide the clearance specified by the manufacturer.
Clean or replace the filter when required. Follow the maintenance schedule and use only the approved cleaning method.
Avoid excessive heat and dust. Operate the projector in an environment that meets its temperature and ventilation requirements.
Use appropriate operating modes. Eco mode may reduce brightness and power consumption, but it should not be used as a substitute for fixing a cooling fault.
Allow proper shutdown and cooling. Follow the manufacturer’s instructions before disconnecting power, especially when the projector uses a lamp that requires a cooling cycle.
Check warning indicators. Do not ignore lamp, filter, or temperature warnings. Their meanings vary by model, so consult the manual.
When Should You Repair or Replace a Projector?
Whether a projector is worth repairing depends on the failed component, the age and value of the unit, parts availability, and the repair cost.
Some problems are relatively straightforward. External lens cleaning, correcting focus, adjusting picture settings, clearing blocked ventilation, and replacing an approved user-serviceable filter may resolve the issue without professional repair.
Other problems require qualified service, including:
- Internal fan or cooling-system failure.
- Persistent temperature warnings after external airflow checks.
- Internal optical contamination or damage.
- Light-source or power-circuit faults.
- Repeated unexpected shutdowns.
- Persistent color distortion or uneven illumination.
Before approving a repair, ask for a diagnosis and an itemized estimate. Compare the total repair cost with the price of a suitable replacement, taking account of image quality, brightness, resolution, warranty, and expected remaining service life.
A projector should not be replaced solely because it has a blurry image, reduced brightness, or a temperature warning. These symptoms can have simple causes. However, repeated shutdowns, serious internal damage, or expensive unavailable parts may make replacement the more practical choice.
FAQs
How do I fix a blurry projector image?
Start by adjusting focus, checking projection distance, cleaning the external lens, and reducing excessive keystone correction. If only one side or the corners remain blurry, check alignment and screen flatness. Persistent uneven focus may require optical inspection.
Why is my projector image suddenly dim?
Check Eco mode, picture settings, lens cleanliness, filter condition, and light-source status. If the internal menu is also dim across different input sources, the problem may involve the projector’s light source or internal components.
Can a clogged projector filter cause overheating?
Yes. On models that use air filters, accumulated dust can restrict airflow and increase internal temperatures. Clean or replace a user-serviceable filter according to the manufacturer’s instructions.
Why does my projector shut off after a few minutes?
Possible causes include overheating, restricted ventilation, fan problems, unstable power, or an internal protection condition. Check warning indicators and external airflow. Repeated shutdowns require further diagnosis rather than repeated restarts.
How do I know if my projector fan is failing?
Warning signs include unusual grinding or rattling, weak airflow, overheating alerts, and unexpected shutdowns. Fan speed can vary normally, so a change in sound alone does not prove failure.
Why is there a yellow spot on my projector screen?
A persistent yellow spot may indicate an internal optical problem or contamination in the light path. Test the projector’s internal menu and another input source. If the spot remains in the same location, arrange professional inspection.
Is a dim projector lamp always a sign that it needs replacing?
No. Incorrect picture settings, Eco mode, dirty optical surfaces, ventilation problems, and other faults can also reduce perceived brightness. Check the lamp hours and the manufacturer’s replacement guidance before ordering a new lamp.
Is a laser projector easier to maintain than a lamp projector?
Laser projectors generally avoid routine lamp-module replacement, but they still require proper ventilation and maintenance. Their internal light-source assemblies and electronics should be serviced according to the manufacturer’s procedures.
Can I open a projector to clean the inside?
Routine user maintenance should be limited to the areas and components identified in the manual. Internal optical assemblies, lamp circuits, power supplies, and cooling components may involve high temperatures, high voltage, or delicate parts. Internal cleaning and electrical testing should be handled by qualified technicians.
Final Projector Troubleshooting Checklist
When troubleshooting a projector, follow the symptoms in order:
- For a blurry image, check focus, distance, alignment, lens cleanliness, and input resolution.
- For a dim image, check picture settings, Eco mode, lens and filter condition, and light-source status.
- For overheating, check ventilation clearance, filter condition, room temperature, and cooling warnings.
- For fan noise, distinguish normal speed changes from new mechanical sounds or weak airflow.
- For unexpected shutdowns, check warning indicators and stop repeated restart attempts.
- For yellow spots, uneven brightness, or persistent color problems, compare the internal menu with external sources and arrange professional inspection when necessary.
The most effective projector troubleshooting starts with simple external checks and symptom-based diagnosis. Avoid replacing parts based on assumptions, and leave internal electrical and optical repairs to qualified technicians.