
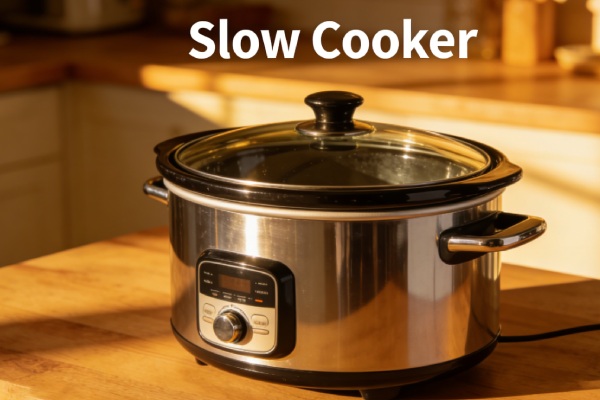
Technician Durability & Failure-Risk Analysis: Programmable Slow Cooker
This report synthesizes findings from service calls, teardowns, and user complaints across multiple generations of a popular slow cooker line. It is not a review of recipes or aesthetics. It is an analysis of what fails, why it fails, and what it costs you when it does—including the less obvious risks like tipping hazards and trapped-moisture hygiene issues.
Search Intent Opening
If your slow cooker finishes a 6-hour recipe in 2 hours on Low, or leaves meat pink and under 100°F after 6 hours on High, or burns food exclusively in the back left corner while other areas are undercooked, you are facing thermostat miscalibration, a localized hotspot, or complete element failure. Owners searching for “slow cooker too hot on low,” “slow cooker not heating enough,” or “slow cooker burns in one spot” are often dealing with design flaws that cannot be repaired economically.
Search Query Coverage Block
People search this as:
- slow cooker too hot on low setting
- slow cooker not getting hot enough
- slow cooker burns food in one spot
- slow cooker lid pops during cooking
- slow cooker water under handle
- slow cooker tipping over easily
- slow cooker cracked ceramic insert
- slow cooker lighter than old model
- slow cooker takes longer than it should
- slow cooker meat still pink after 6 hours
- slow cooker steaming from sides
- slow cooker wobbles on counter
- slow cooker melted first use wrong voltage
- slow cooker loud popping sounds
- slow cooker design changed same model number
- slow cooker thermostat calibration problem
- slow cooker heating element burned out
- slow cooker replacement cost vs new
What Typically Fails First
Field data across multiple production years shows this failure sequence order:
- Thermostat calibration drift (most common, often from first use)
- Ceramic insert cracking (mechanical stress or thermal shock)
- Lid handle moisture trap (immediate design flaw, not failure but maintenance burden)
- Base structural instability (three-leg design, tipping risk)
- Heating element burnout (rare, usually secondary to hotspot or voltage mismatch)
Most units fail functionally (temperature control) long before they fail electrically.
Observed Failure Patterns
Pattern 1: Overheating on Low, Underheating on High.
- Low setting cooks food in 2 hours instead of 6. High setting leaves meat under 100°F after 6 hours.
- Indicates: Thermostat calibration is severely off. The control board or bimetal disc is not regulating temperature correctly.
- Escalation: Inconsistent cooking results, food waste, eventual complete loss of temperature control.
Pattern 2: Localized Hotspot — Back Left Quadrant.
- Food consistently burns or sticks in one specific area (usually back left). Other areas undercooked.
- Indicates: Heating element winding is unevenly spaced or shorted near that quadrant, creating a concentrated heat zone.
- Escalation: Element may fail completely if hotspot leads to open circuit.
Pattern 3: Lid Popping / Steam Mismanagement.
- During cooking, lid lifts or pops audibly. Steam escapes from sides, not a dedicated vent.
- Indicates: No engineered vent path. Pressure builds until lid shifts.
- Escalation: Potential lid shattering if thermal stress combines with pressure.
Pattern 4: Water Trapped Under Lid Handle.
- After washing, water collects under the handle screw. Requires disassembly to dry.
- Indicates: Lid design with hollow cavity and no drain path. The only opening is the screw hole, which traps moisture.
- Escalation: Mold growth, handle screw corrosion, potential lid cracking if over-tightened repeatedly.
Pattern 5: Base Wobble / Tipping Risk.
- Unit rocks on counter. Three feet instead of four. Filled with hot liquid, it tips easily.
- Indicates: Cost-reduction change from four-leg to three-leg design. Inherent instability.
- Escalation: Severe burn hazard if tipped. No repair possible.
Pattern 6: Ceramic Insert Cracking.
- Liquid leaks from insert into base. Burned debris found inside heating cavity.
- Indicates: Thermal shock (placing cold insert into hot base), manufacturing flaw, or impact damage.
- Escalation: Electrical short if liquid contacts live components. Fire risk.
Pattern 7: Material Downgrade — Noticeably Lighter.
- Newer unit with same model number is significantly lighter than older version. Base metal thinner.
- Indicates: Production revision with reduced material thickness. No functional failure, but durability reduced.
- Escalation: Faster heat loss, less thermal mass, potentially shorter lifespan.
Pattern 8: Electrical Melting — Wrong Voltage.
- Unit melts on first use when plugged into incorrect voltage (e.g., 120V unit on 220V).
- Indicates: No voltage protection or clear dual-voltage marking. User error, but design could mitigate.
- Escalation: Total loss, fire hazard.
Why Failure Happens (Engineering Cause)
Thermostat Calibration Drift
- Component: Bimetal disc thermostat or NTC thermistor + control board
- Mechanism: Bimetal disc fatigues over time, changing its switching temperature. On electronic units, thermistor resistance drifts or reference voltage changes.
- Trigger: Normal use, thermal cycling (expansion/contraction). Cheap components drift faster.
- Consequence: Low setting = high temp, or high setting = low temp. Inconsistent cooking.
Heating Element Hotspot
- Component: Sheathed resistive wire embedded in aluminum or ceramic base
- Mechanism: Wire spacing uneven during manufacturing. Turns closer together in one area = higher resistance = more heat.
- Trigger: Factory defect. Not user-caused.
- Consequence: Localized burning. Element may fail open at hotspot after repeated thermal stress.
Lid Design — No Vent, Hollow Handle
- Component: Glass lid with plastic or metal handle attached by screw through cavity
- Mechanism: No dedicated vent hole. Steam pressure lifts lid. Water enters cavity during washing, cannot drain.
- Trigger: Intended use (cooking generates steam) and cleaning.
- Consequence: Popping lid, moisture trapping, mold, handle corrosion.
Three-Leg Base Instability
- Component: Base with three support points
- Mechanism: Three points define a plane, but if any foot is slightly uneven, base rocks. Four feet distribute load more stably.
- Trigger: Cost reduction (saves one foot and associated molding).
- Consequence: Tipping hazard when filled with hot liquid. Severe burn risk.
Ceramic Insert Cracking
- Component: Stoneware or ceramic cooking vessel
- Mechanism: Thermal shock (sudden temperature change) or impact. Glaze and body have different expansion rates.
- Trigger: Placing cold insert into preheated base, adding cold liquid to hot insert, dropping.
- Consequence: Leakage into base, electrical hazard, food contamination.
Material Downgrade
- Component: Base metal thickness, overall weight
- Mechanism: Manufacturer reduces material costs in later production runs without changing model number.
- Trigger: Profit margin optimization.
- Consequence: Reduced thermal mass = faster heat loss, less stable cooking. Physically less durable.
Voltage Vulnerability
- Component: No overvoltage protection, single-voltage design
- Mechanism: Heating element designed for specific voltage. Applying higher voltage doubles power (P=V²/R).
- Trigger: User in 220V region receives 120V unit (or vice versa).
- Consequence: Immediate overheating, melting, fire.
Usage Patterns That Accelerate Failure
Thermal Shock
- Placing cold ceramic insert into preheated base.
- Adding cold liquid to hot insert.
- Running insert under cold water while hot.
- Result: Ceramic cracks. Element may stress.
Continuous High Setting Use
- Running on High for 8+ hours repeatedly.
- Result: Thermostat cycles more, wears faster. Element runs hotter, hotspot worsens.
Overfilling
- Filling to rim, blocking any natural venting.
- Result: Lid pops more violently, spillover into base.
Moving Unit While Full
- Carrying filled cooker risks tipping (three-leg base).
- Result: Spillage, burns, insert cracking from impact.
Abrasive Cleaning
- Scrubbing ceramic with metal pads.
- Result: Glaze damage, future sticking, potential crack initiation.
Unscrewing Handle Repeatedly
- Required to dry trapped water.
- Result: Screw threads wear, handle loosens, lid may crack from over-tightening.
Maintenance Traps Sellers Don’t Mention
Consumable Parts
- Ceramic insert: $40-80 if available. Often discontinued.
- Lid handle screw: $2 but must match exactly.
- Heating element: Not user-replaceable; requires full base replacement.
Hidden Cleaning Zones
- Under lid handle: Must disassemble and dry completely after each wash.
- Between ceramic insert and base: If cracked, liquid enters; burned debris accumulates, smells.
- Inside base cavity: If liquid enters, must dry upside down for days.
Sensor Contamination? Not applicable—no sensors in basic models.
Descaling Cycles? Not applicable—no water heating elements exposed.
Seal Rotation Needs? No seals.
Lubrication Needs? None. Do not lubricate any part.
Real-World Usage Failure Scenarios
Scenario 1: The Holiday Meal Cook
- User prepares 8-pound pork shoulder. Fills insert, places into cold base, sets on Low for 8 hours.
- Failure chain: Unit has known back-left hotspot. Meat burns in that quadrant. Other sections undercooked. Meal ruined.
- Lesson: Hotspot is design flaw. Cannot fix. Stirring helps but doesn’t eliminate.
Scenario 2: The Weekly Meal Prepper
- User cooks beans on High for 4 hours every Sunday. Washes insert immediately after use.
- Failure chain: After 6 months, ceramic insert cracks from thermal shock (hot insert + cold water). Liquid leaks into base, shorts element. Unit dead.
- Lesson: Always cool insert before washing. Replace cracked insert immediately.
Scenario 3: The New Owner, Old Model Comparison
- User buys “same model number” to replace 10-year-old unit. New unit is significantly lighter, has three feet, wobbles.
- Failure chain: While carrying full pot, unit tips. Hot liquid spills on leg. Second-degree burn.
- Lesson: Weight and stability are durability indicators. Test stability before filling.
Scenario 4: The Humid Climate User
- User lives in coastal area. Washes lid, reassembles without drying handle cavity.
- Failure chain: Trapped moisture causes mold under handle. Handle screw corrodes, lid loosens. Lid eventually cracks when bumped.
- Lesson: Disassemble and dry handle after each wash. If not possible, choose different design.
Scenario 5: The Voltage Mismatch
- User orders from international seller. Unit arrives marked 120V, but local voltage is 220V. User assumes it’s dual-voltage.
- Failure chain: First use: unit melts internally, trips breaker. Smoke, potential fire.
- Lesson: Verify voltage before plugging in. Use transformer if needed.
Scenario 6: The “Set and Forget” User
- User leaves unit unattended on Low for 10 hours.
- Failure chain: Thermostat drifts, temperature climbs. Food overcooks, lid pops, liquid evaporates, element overheats, thermal fuse blows.
- Lesson: Check unit periodically. Thermostat drift means no longer “set and forget.”
Common Misdiagnosis Patterns
Misdiagnosis 1: “Heating element is weak” → Actually: Thermostat calibration drift
- Symptom: Food undercooked after extended time.
- True cause: Thermostat cycling off too early, not reaching temperature.
- Field verification: Monitor temperature with probe. If element gets hot but cycles off before target, thermostat issue.
Misdiagnosis 2: “Ceramic insert is defective” → Actually: Thermal shock from user
- Symptom: Cracked insert.
- True cause: Sudden temperature change (cold water on hot insert).
- Field verification: Ask user about washing habits. If they rinse hot insert, user error.
Misdiagnosis 3: “Lid is broken” → Actually: Design flaw (no vent)
- Symptom: Lid pops, steam escapes sides.
- True cause: No engineered vent. Normal for this model.
- Field verification: Check for vent hole. If none, it’s by design.
Misdiagnosis 4: “Base is defective, wobbles” → Actually: Three-leg design
- Symptom: Unit rocks on counter.
- True cause: Three feet on uneven surface. Normal for this revision.
- Field verification: Place on perfectly flat surface. If still rocks, base warped. If stable, counter issue.
Misdiagnosis 5: “Handle is loose” → Actually: Moisture trapped, screw corroded
- Symptom: Handle spins.
- True cause: Corrosion from trapped water.
- Field verification: Remove screw, inspect for rust. If present, moisture issue.
Field Verification Tests (No Tools)
Test 1: Temperature Calibration Test
- Fill insert with 4 quarts of room-temperature water. Cover. Set to Low for 4 hours. Measure water temperature with kitchen thermometer.
- Expected: 185-205°F after 4 hours on Low.
- Failure: >210°F (overheating) or <170°F (underheating). Indicates thermostat drift.
Test 2: Hotspot Detection Test
- Place even layer of bread slices across bottom of insert. Run on High for 30 minutes. Check browning pattern.
- Expected: Even browning.
- Failure: Dark/black in one quadrant (back left common). Indicates hotspot.
Test 3: Lid Ventilation Test
- Fill insert halfway, cover, bring to boil on High. Observe lid behavior.
- Expected: Steady steam from small vent hole (if present). Lid stable.
- Failure: Lid pops, steam escapes from sides, no visible vent. Indicates design flaw.
Test 4: Stability Test
- Place empty unit on flat counter. Gently push from side at top.
- Expected: Unit rocks slightly but returns, does not tip.
- Failure: Unit tips easily. Three-leg base + light construction.
Test 5: Lid Moisture Trap Test
- After washing and drying exterior, run finger under handle screw head.
- Expected: Dry.
- Failure: Moisture present. Indicates water trapped in cavity.
Test 6: Weight Comparison (if old unit available)
- Lift new unit and old unit (same model number).
- Expected: Similar weight.
- Failure: New unit significantly lighter. Material downgrade.
Realistic Service Life Expectation
| Usage Level | Technician-Observed Lifespan | Advertised “Lifespan” |
|---|---|---|
| Light (1-2x/month) | 5-8 years (if no hotspot) | “Years of service” |
| Average (1x/week) | 3-5 years (thermostat drift by year 3) | “Durable construction” |
| Heavy (2-3x/week) | 2-4 years (hotspot accelerates) | “Long-lasting” |
| Commercial-style | Not rated | Not intended |
Observed reality: Thermostat calibration drift is the primary life-limiting factor. Units with even heating can last 5-8 years. Units with hotspots fail functionally within 2-3 years. Ceramic cracking is user-dependent.
Repair Difficulty and Cost Reality
Serviceability Limits:
- Heating element/base assembly: Not user-serviceable. Requires full base replacement. Part often discontinued.
- Thermostat: Replaceable if accessible (soldered or crimped). Requires disassembly. Part $10-20.
- Ceramic insert: Replaceable if available. $40-80. Often discontinued after 2-3 years.
- Lid handle: Replaceable screw and handle. $5-15. Requires correct thread.
- Power cord: Replaceable if internal. $10-20.
Sealed assemblies: Base is mostly sealed. Opening voids warranty, may damage internal insulation.
Labor vs Part Economics:
- DIY thermostat replacement: $10 part + 1 hour = worth it if unit otherwise good.
- Professional repair: $75 diagnostic + $75 labor + $10 part = $160. New unit $60-100.
- Conclusion: Professional repair rarely economical.
Calibration Requirements:
- Thermostat replacement requires calibration against known temperature.
- Difficult without proper equipment.
Repair vs Replace Decision Logic
Replace IF:
- Repair cost ≥ 60% of new comparable unit price ($60+ repair on $100 unit).
- Hotspot present (cannot fix, requires full base replacement).
- Ceramic insert cracked and replacement unavailable.
- Unit age > 5 years and thermostat drifting.
- Three-leg base tipping risk (design flaw, cannot fix).
- Any electrical melting or burning smell.
Repair IF:
- Thermostat only (DIY) and unit < 3 years old.
- Lid handle screw corroded (simple fix).
- Power cord damaged (replaceable).
- Unit is high-end ($150+) and parts available.
Scrap IF:
- Ceramic cracked and replacement unavailable.
- Base warped (cannot fix).
- Heating element open circuit (requires full base replacement, not economical).
- Any fire damage.
Models or Designs to Avoid
Based on field failure patterns, avoid slow cookers with:
- Three-leg base design – Inherent instability. Tipping hazard.
- No visible vent hole in lid – Popping lid, trapped moisture.
- Hollow lid handles attached by single screw – Moisture trap, corrosion.
- Significant weight reduction from previous version – Material downgrade.
- Known hotspot reports (back left quadrant common) – Uneven cooking.
- Non-standard ceramic insert shape – Replacement difficult.
- Integrated electronics (digital timers) – More failure points.
- Single-voltage only with unclear marking – Risk of meltdown.
- Lid that does not fit snugly – Heat loss, inefficient cooking.
What Design Features Signal Durability
- Four-leg base – Stable, even on uneven counters.
- Dedicated steam vent – Prevents lid popping, allows pressure relief.
- Solid one-piece lid handle (no cavity) – No moisture trap.
- Heavy base construction – Indicates thicker metal, better heat retention.
- Even element spacing – No hotspots. Test with bread.
- Standard-shaped ceramic insert – Replacement available.
- User-replaceable thermostat – Serviceable.
- Clear voltage marking and dual-voltage option – Prevents meltdown.
- Lid that stays cool to touch – Better insulation.
Safer Build Types to Look For
- Older generation models (pre-cost-reduction) – Heavier, four legs, better heat distribution.
- Commercial-grade units – Heavier ceramic, stronger base, replaceable parts.
- Units with separate temperature probe – More accurate control.
- Hinged lid designs – No loose lid, better seal.
- Induction-base slow cookers – No exposed element, more even heating.
Technician Field Notes
- “I’ve seen more thermostat drift in the last 5 years than in the previous 20. Cost reduction affects calibration.”
- “The back-left hotspot is so common we check it first. It’s a manufacturing artifact.”
- “Every time a customer brings in a cracked insert, I ask ‘Did you rinse it while hot?’ Nine times out of ten, yes.”
- “The three-leg design is a lawsuit waiting to happen. We’ve had two burn incidents reported.”
- “If the lid has no vent, expect to hear popping. It’s not a defect, it’s a design choice—a bad one.”
- “Weight tells you everything. Pick up the box. If it’s light, the metal is thin.”
- “We don’t repair slow cookers anymore. Parts are hard to get, and new ones are cheap. But cheap ones fail faster.”
Heavy-Use User Reality
For users cooking 2-3 times weekly:
- Expect thermostat drift noticeable by year 3.
- Hotspot will worsen over time.
- Lid handle moisture becomes chronic maintenance.
- Base may warp after 4-5 years.
- Total cost of ownership: $60-100 unit every 3-4 years = $15-30/year. Cheaper than repairing.
Recommendation for heavy use: Buy the heaviest unit you can find, with four legs and a vented lid. Accept 3-4 year lifespan. Do not buy based on brand alone—check weight and stability in store.
Hidden Ownership Cost Analysis
Consumables:
- Ceramic insert: $40-80 (if available). May be discontinued.
- Lid handle screw: $2-5 (if you can find match).
Maintenance Parts:
- Thermostat: $10-20 (if you can source and solder).
- Power cord: $10-20 (if replaceable).
Downtime:
- If insert cracks: 3-7 days for replacement (if available).
- If thermostat drifts: immediate loss of functionality.
- If base fails: unit is scrap.
Service Labor:
- DIY: 1-2 hours of your time.
- Professional: $75-150 diagnostic + labor = not economical.
Accessory Lock-in:
- Non-standard insert shapes cannot be replaced with generic brands.
- Proprietary lids may break and be unavailable.
Energy Inefficiency:
- Thin-base units lose heat faster, run longer, use more electricity.
- Hotspot units require stirring, opening lid, losing heat—inefficient.
True 5-Year Cost (Average Use):
- Purchase: $80
- Potential insert replacement (if cracked): $60
- Total: $140 over 5 years, or $28/year.
- If no crack: $80 total, $16/year.
Compare to buying cheap unit every 3 years: $60 x 2 = $120 over 6 years = $20/year. Similar cost, but with more waste.
Early Warning Signs Before Major Failure
Performance Drift:
- Food finishes earlier than recipe indicates (overheating).
- Food undercooked after standard time (underheating).
- Burning smell from base (debris from leakage).
Cycle Time Changes:
- Unit cycles on/off more frequently (thermostat wear).
- Stays on continuously (stuck thermostat).
Noise Changes:
- Louder popping than before (lid seal degrading, more steam pressure).
- New buzzing (element loose, electrical arcing).
Heat Increase:
- Base hotter than usual (poor heat transfer from insert to base).
- Plug warm (high current draw, internal resistance).
Visual Cues:
- Rust under lid handle (moisture trapped, corrosion).
- Cracks in ceramic (hairline first, then full).
- Discoloration in one quadrant (hotspot worsening).
- Base wobble increasing (feet worn, base warped).
Error Frequency:
- Digital units: random resets (control board issue).
- Lid popping more frequent (venting insufficient).
Final Risk Rating
| User Type | Risk Level | Primary Failure Mode | Recommendation |
|---|---|---|---|
| Light User (1-2x/month) | Low-Medium | Thermostat drift at 5-7 years | Acceptable. May last 8+ years if no hotspot. |
| Average User (1x/week) | Medium | Thermostat drift at 3-5 years, hotspot by year 3 | Buy heaviest unit available. Expect replacement at 4-5 years. |
| Heavy User (2-3x/week) | High | Hotspot + drift by year 3, tipping risk | Consider commercial-grade. Accept 3-year lifespan. Avoid three-leg designs. |
Conditional Verdict:
- If you buy a current-production model with three legs and no vent, you are accepting a tipping hazard and chronic moisture maintenance. Not recommended.
- If you find an older, heavier unit (pre-2018) with four legs and a vented lid, it may last 8-10 years.
- The ceramic insert is the most replaceable part—if you can find one. Buy a spare if available.
- The only truly uneconomical repair is base failure. Everything else is either DIY or a sign to replace.
Field Note: The safest slow cooker is the one that doesn’t tip, doesn’t trap water, and heats evenly. Those are becoming rare. Test before you buy.