
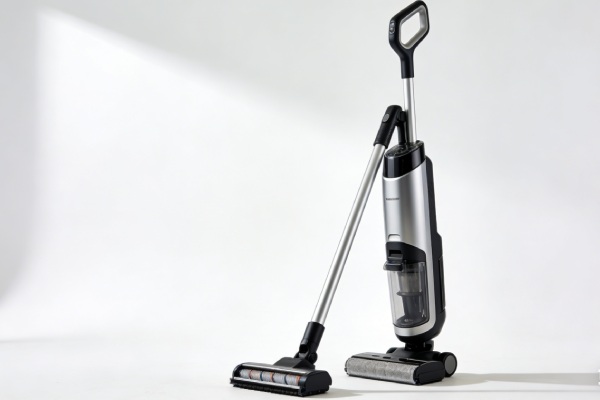
This report synthesizes findings from service calls, teardowns, and user complaints across multiple upright vacuum models that prioritize raw suction power over usability and durability. It is not a review of “deep cleaning” claims or cyclonic technology. It is an analysis of what fails, why it fails, and what it costs you when it does—including the less obvious issues like ergonomic injury risk, attachment unreliability, and internal debris trapping that makes emptying a chore.
Search Intent Opening
If your upright vacuum locks onto carpet so tightly you cannot push it, tips over when you step on the cord, has attachments that fall off or fail within weeks, or requires a spatula to dig clumped debris from the dust cup, you are facing fundamental design flaws that prioritize marketing specs over real-world usability. Owners searching for “vacuum too hard to push on carpet,” “upright vacuum attachments keep falling off,” or “dust cup won’t empty completely” are often dealing with engineering choices that make the product physically demanding to use and short-lived.
Search Query Coverage Block
People search this as:
- vacuum too hard to push on carpet
- upright vacuum stuck to floor won’t move
- vacuum attachments fall off when pulling back
- pet hair brush stopped working after few uses
- vacuum dust cup won’t empty completely
- vacuum tips over when stepping on cord
- vacuum top heavy falls over on stairs
- vacuum hose too short to reach
- vacuum crevice tool has vent holes no suction
- vacuum brush tool impossible to remove
- vacuum makes screeching noise then dies
- vacuum dust blows in face when emptying
- vacuum self-propels runs away
- vacuum toe release too sensitive
- vacuum cord always in the way
- vacuum narrower than old model more passes
- vacuum attachments broke during removal
- vacuum stopped working after 14 uses
What Typically Fails First
Field data across multiple upright vacuum models with excessive suction designs shows this failure sequence order:
- User frustration / physical strain (immediate, within first use)
- Attachment mechanical failure (pet brush, power tools within weeks to months)
- Dust cup internal clogging (debris trapped, requires manual extraction)
- Stability incidents (tipping, falls, damage within months)
- Belt/motor wear from overwork (6-18 months)
- Cord management system failure (clip breaks, constant annoyance)
Most units become functionally unusable (too hard to push, attachments broken, dust cup impossible to empty) long before the main motor fails. The design itself ensures high physical demand and early component failure.
Observed Failure Patterns
Pattern 1: Carpet Locking — Cannot Push.
- When vacuum is placed on carpet, it adheres so strongly that user cannot move it forward. Even on lowest suction setting, full body strength required. Suction release collar ineffective.
- Indicates: Motor produces excessive static pressure relative to floor head design. No effective pressure relief mechanism.
- Escalation: User injury (back strain, herniated disc), carpet damage, abandonment.
Pattern 2: Attachment Ejection — Tools Fall Off.
- While vacuuming, attached tools pop off when pulling backward. User must constantly reattach.
- Indicates: Friction-fit or air-pressure retention insufficient for reverse motion. Design assumes only forward movement.
- Escalation: Lost tools, user frustration, eventual breakage if stepped on.
Pattern 3: Power Brush Failure — Stops Spinning.
- Pet hair or power brush tool works initially, then stops spinning within weeks. May make screeching noise before failure.
- Indicates: Small motor or gearbox in tool under-specified for load. Hair wrap adds resistance, accelerates wear.
- Escalation: Tool unusable. Replacement often unavailable or fails same way.
Pattern 4: Dust Cup Debris Trap — Won’t Empty.
- When emptying dust cup, debris remains trapped between inner and outer walls, or around internal plastic tabs. Requires spatula, fingers, or tools to extract. Fine dust blows into face during emptying.
- Indicates: Internal geometry prioritizes cyclonic airflow over clean release. Multiple cavities trap material.
- Escalation: User avoids emptying, performance drops, mold/odor develops.
Pattern 5: Top-Heavy Tipping — Falls Over.
- Vacuum tips over when hose is pulled, when cord is stepped on, or when lightly bumped. Particularly dangerous on stairs.
- Indicates: High center of gravity, narrow wheelbase, poor balance. Cord exits low on side, creating leverage.
- Escalation: Physical damage to unit, user injury risk.
Pattern 6: Hose Geometry Limitation — Can’t Reach.
- Built-in rigid U-curve in hose reduces effective length and flexibility. User must lift entire canister to reach high places.
- Indicates: Cost-cutting in hose design, or aesthetic choice over function.
- Escalation: Usability severely limited, user abandons above-floor cleaning.
Pattern 7: Crevice Tool Suction Loss — Vent Holes.
- Crevice tool has vent holes that reduce suction at tip, making it ineffective for tight spaces.
- Indicates: Design choice to prevent tool from sticking to surfaces, but compromises performance.
- Escalation: Cannot clean corners effectively.
Pattern 8: Toe-Release Design Flaw — Unintentional Operation.
- Pedal to release handle is too sensitive, causing unintended release. Also may re-lock unexpectedly during use.
- Indicates: Poor spring tension design, or mechanism binds.
- Escalation: User frustration, potential fall if handle releases at wrong moment.
Pattern 9: Narrow Cleaning Width — More Passes.
- Floor head narrower than previous models, requiring more passes to cover same area.
- Indicates: Cost reduction or design change without regard for efficiency.
- Escalation: Increased cleaning time, user fatigue.
Pattern 10: Cord Interference — Constant Management.
- Cord exits from bottom right side, constantly in way. User must clip/unclip repeatedly while vacuuming.
- Indicates: Poor cord routing design. Cord clip too low to keep elevated.
- Escalation: Vacuum tips when cord stepped on, user annoyance.
Why Failure Happens (Engineering Cause)
Excessive Suction / No Pressure Relief
- Component: High-pressure motor, floor head design, suction release valve
- Mechanism: Motor generates high static pressure. Floor head lacks adequate air bleed or wheels to allow movement. Release valve undersized or poorly positioned.
- Trigger: Use on medium/high pile carpet.
- Consequence: Physical inability to push, user strain, carpet damage.
Attachment Retention Failure
- Component: Plastic snap-fit or friction-fit connectors
- Mechanism: Tools held by spring-loaded detents or simple taper. Reverse motion overcomes retention force.
- Trigger: Pulling vacuum backward with tool attached.
- Consequence: Tools fall off, lost, or damaged.
Power Brush Underspecification
- Component: Small DC motor, plastic gears, brush roll
- Mechanism: Motor sized for minimal cost, not actual load. Hair wrap increases torque demand. Gears strip.
- Trigger: Use with pet hair, long hair.
- Consequence: Tool failure, screeching noise, complete loss of function.
Dust Cup Internal Trapping
- Component: Molded plastic vanes, dual-wall construction
- Mechanism: To create cyclonic action, internal structures must direct airflow. These same structures trap debris. Bottom door opening not aligned with trapped areas.
- Trigger: Emptying cycle.
- Consequence: Debris remains, requires manual extraction, user exposed to dust.
Stability Imbalance
- Component: Wheelbase width, center of gravity height, cord exit point
- Mechanism: Heavy motor at top, narrow footprint. Cord pulling from low side creates tipping moment.
- Trigger: Pulling hose, stepping on cord.
- Consequence: Unit tips, potential damage or injury.
Hose Rigidity / Short Length
- Component: Molded hose with integral U-bend
- Mechanism: U-bend molded as single piece restricts flexibility and effective length.
- Trigger: Above-floor cleaning.
- Consequence: Cannot reach, user lifts whole vacuum.
Crevice Tool Vent Holes
- Component: Plastic tool with intentional openings
- Mechanism: Holes reduce suction to prevent tool from sticking, but also reduce cleaning effectiveness.
- Trigger: Use in corners.
- Consequence: Poor performance.
Toe-Release Mechanism Wear
- Component: Plastic pedal, spring, locking pawl
- Mechanism: Spring tension too high or too low. Pawl wears, slips.
- Trigger: Frequent release cycles.
- Consequence: Unintended release or lock.
Narrow Floor Head
- Component: Floor head width
- Mechanism: Narrower head reduces material cost but increases passes.
- Trigger: Every use.
- Consequence: Longer cleaning time.
Usage Patterns That Accelerate Failure
Vacuuming Thick Carpet
- High suction causes locking, motor works harder.
- Result: User strain, potential motor overheating.
Pulling Vacuum Backward with Attachments
- Reverse motion pops off tools.
- Result: Lost tools, frustration.
Vacuuming Pet Hair Regularly
- Hair wraps brush rolls, loads motors.
- Result: Power brush failure in weeks.
Letting Dust Cup Overfill
- Debris packs into internal cavities.
- Result: Impossible to empty, permanent clog.
Yanking Hose to Extend Reach
- Tips vacuum, stresses hose connections.
- Result: Damage, tipping.
Using on Stairs
- Top-heavy design increases fall risk.
- Result: Injury, unit damage.
Ignoring Cord Management
- Stepping on cord tips vacuum.
- Result: Physical damage.
Maintenance Traps Sellers Don’t Mention
Consumable Parts
- Power brush tools: $30-60, fail within months.
- Belts: $5-10, wear with use.
- Filters: $10-20, require frequent replacement.
- Attachments: $10-30 each, often proprietary.
Hidden Cleaning Zones
- Between dust cup walls: Debris accumulates, requires tools to extract.
- Under internal vanes: Hair wraps, must be cut out.
- Brush roll ends: Hair migrates, seizes bearings.
- Hose interior: Debris clings, reduces airflow.
Sensor Contamination
- Some models have airflow sensors that clog, triggering false shutdowns.
- Requires disassembly to clean.
Lubrication Needs
- Brush roll bearings may benefit from occasional oil, but not mentioned.
- Power brush gears cannot be lubricated—sealed.
Real-World Usage Failure Scenarios
Scenario 1: The Carpeted Home Owner
- User has medium-pile carpet throughout. First use: vacuum locks onto floor, cannot push. User applies full body strength, manages to move slowly. After 10 minutes, back hurts. After 3 uses, user dreads vacuuming.
- Failure chain: Design flaw prevents normal use. User abandons vacuum, buys different brand.
- Lesson: Excessive suction without relief is a usability failure, not a feature.
Scenario 2: The Multi-Pet Household
- User vacuums daily, lots of dog hair. Pet power brush works for 3 weeks, then makes screeching noise and stops. Replacement brush ordered, fails within 1 month. Third brush also fails.
- Failure chain: Underspecified motor in tool cannot handle hair load. Repeated failure indicates design flaw.
- Lesson: Power brushes in this model are disposable.
Scenario 3: The Detail Cleaner
- User needs to vacuum corners, baseboards, upholstery. Attachments keep falling off when pulling back. Crevice tool has vent holes, won’t pick up debris. Hose too short to reach ceiling corners.
- Failure chain: Attachment system unusable. User gives up on above-floor cleaning.
- Lesson: Tools designed for marketing photos, not real use.
Scenario 4: The Emptying Routine
- User empties dust cup after each use. Debris clings to internal walls, won’t fall out. User taps, bangs, uses spatula. Fine dust blows into face. After 6 months, user dreads emptying.
- Failure chain: Internal geometry traps debris, makes maintenance unpleasant.
- Lesson: Dust cup design prioritizes cyclonic claims over user experience.
Scenario 5: The Staircase User
- User carries vacuum upstairs. While vacuuming, steps on cord, vacuum tips, falls down several steps. Plastic cracks, unit unusable.
- Failure chain: Low cord exit + top-heavy design + stairs = disaster.
- Lesson: Stability design insufficient for real-world use.
Scenario 6: The Long-Term Owner
- User bought vacuum for its “power.” After 14 months, main motor makes screeching noise and stops. No repair options, replacement cost high.
- Failure chain: Motor bearings failed. Unit scrap.
- Lesson: Even main motor not built for longevity.
Common Misdiagnosis Patterns
Misdiagnosis 1: “Vacuum is broken, won’t move” → Actually: Design flaw
- Symptom: Cannot push on carpet.
- True cause: Excessive suction, no effective release.
- Field verification: Test on hard floor—moves easily. On carpet, locks. Design issue, not failure.
Misdiagnosis 2: “Attachments are defective” → Actually: Retention system inadequate
- Symptom: Tools fall off.
- True cause: Friction-fit cannot handle reverse motion.
- Field verification: Push forward—tools stay. Pull back—fall off. Design issue.
Misdiagnosis 3: “Power brush motor died” → Actually: Hair wrap seized bearings
- Symptom: Brush won’t spin.
- True cause: Hair wrapped around shaft,增加了阻力。
- Field verification: Remove brush roll, clean ends. If spins freely, maintenance issue.
Misdiagnosis 4: “Dust cup latch broken” → Actually: Debris blocking door
- Symptom: Cup won’t open.
- True cause: Debris packed behind door, prevents release.
- Field verification: Push door manually with tool. If opens, debris obstruction.
Misdiagnosis 5: “Vacuum tips over because I’m clumsy” → Actually: Design flaw
- Symptom: Tips when cord stepped on.
- True cause: Low cord exit + high center of gravity.
- Field verification: Place on level floor, step on cord gently. Tips. Design issue.
Misdiagnosis 6: “Hose is too short” → Actually: Rigid U-bend wastes length
- Symptom: Can’t reach high places.
- True cause: Molded curve reduces effective length.
- Field verification: Compare to straight hose of same length—rigid bend limits reach.
Field Verification Tests (No Tools)
Test 1: Carpet Push Test
- Place vacuum on medium-pile carpet. Turn on. Attempt to push forward.
- Expected: Moves with moderate effort.
- Failure: Cannot move, or requires excessive force. Indicates design flaw.
Test 2: Attachment Retention Test
- Attach a tool. Pull vacuum backward across floor.
- Expected: Tool remains attached.
- Failure: Tool pops off. Indicates inadequate retention.
Test 3: Dust Cup Emptying Test
- After vacuuming, attempt to empty cup over trash. Observe debris release.
- Expected: Most debris falls freely.
- Failure: Debris trapped in cavities, requires manual removal.
Test 4: Stability Test
- Place vacuum on level floor. Step gently on cord near vacuum.
- Expected: Vacuum may shift but not tip.
- Failure: Tips over easily. Indicates stability issue.
Test 5: Hose Reach Test
- Extend hose fully without lifting canister. Note highest point reached.
- Expected: Reaches typical ceiling height (8 feet) with canister on floor.
- Failure: Cannot reach without lifting unit. Hose too short or rigid.
Test 6: Power Brush Test
- Run power brush on low-pile carpet. Observe rotation.
- Expected: Consistent spin, no noise.
- Failure: Intermittent, noisy, or stops—indicates motor or gear issue.
Test 7: Toe-Release Test
- Step on pedal to release handle. Repeat 10 times.
- Expected: Consistent release and lock.
- Failure: Unintentional release or lock—mechanism issue.
Realistic Service Life Expectation
| Usage Level | Technician-Observed Lifespan | Primary Failure Mode |
|---|---|---|
| Light (1x/week, hard floors) | 3-4 years | Dust cup clogs, user frustration |
| Average (2x/week, some carpet) | 2-3 years | Attachment failure, ergonomic strain |
| Heavy (daily, pets, thick carpet) | 1-2 years | Power brush failure, motor wear |
| Staircase use | Variable | Tipping damage |
Observed reality: Physical usability is the primary limiting factor. Users abandon these vacuums long before catastrophic failure due to the effort required to use them and the constant attachment issues.
Repair Difficulty and Cost Reality
Serviceability Limits:
- Main motor: Replaceable but requires disassembly. $50-100 part.
- Power brush tools: Replaceable if available. $30-60. Often fail again.
- Belts: Replaceable. $5-10.
- Attachments: Replaceable if available. $10-30.
- Dust cup assembly: Not replaceable separately—integral to unit.
- Hose: Replaceable if available. $20-40.
- Switches: Replaceable. $5-15.
Sealed assemblies: Dust cup internal geometry cannot be changed.
Labor vs Part Economics:
- DIY belt replacement: $10 part + 15 minutes = worth it.
- DIY power brush replacement: $40 part + 5 minutes = worth it, but may fail again.
- Professional repair: $100 diagnostic + $100 labor + parts = $200-300. New vacuum $200-400.
- Conclusion: Professional repair borderline. DIY for simple parts, but root design flaws remain.
Calibration Requirements:
- None.
Repair vs Replace Decision Logic
Replace IF:
- Repair cost ≥ 60% of new comparable unit price ($150+ repair on $250 vacuum).
- Multiple power brushes failed (design flaw, will recur).
- Usability issues (too hard to push, tips over) cannot be fixed.
- Dust cup permanently clogged (internal debris).
- Motor failed and unit > 3 years old.
- Physical damage from tipping.
Repair IF:
- Belt replacement only.
- Simple attachment replacement.
- Switch replacement (DIY).
Scrap IF:
- Usability makes vacuum unusable for you (too hard to push).
- Multiple subsystems failing (brush + motor + attachments).
- Parts unavailable for common failures.
- User injury risk (back strain, tipping hazard).
Models or Designs to Avoid
Based on field failure patterns, avoid upright vacuums with:
- No effective suction release on carpet – Unusable on medium/high pile.
- Attachments held only by friction – Fall off during use.
- Power brush tools with small motors – Fail quickly.
- Dust cup with internal vanes and cavities – Traps debris.
- Low side-exit cord – Tipping hazard.
- Narrow floor head – More passes, more work.
- Rigid molded hose with U-bend – Limited reach.
- Top-heavy design, narrow wheelbase – Tips easily.
- Toe-release pedal with poor tension – Unintentional operation.
- Crevice tools with vent holes – Ineffective.
What Design Features Signal Durability
- Adjustable suction or effective release valve – Usable on all carpets.
- Positive-lock attachment system – Tools stay on.
- Robust power brush with accessible bearings – Serviceable.
- Simple, smooth-walled dust cup – Empties completely.
- High, centered cord exit – No tipping.
- Wide floor head – Fewer passes.
- Flexible, straight hose – Full reach.
- Low center of gravity, wide wheelbase – Stable.
- Intuitive, reliable release mechanism – No surprises.
- Full-function tools – No vent holes.
Safer Build Types to Look For
- Vacuums with adjustable suction control – Dial or slider.
- Canister vacuums – Lighter head, easier to push.
- Bagged uprights – Simpler dust disposal, no internal traps.
- Commercial-grade uprights – Heavier, but serviceable.
- Vacuums with metal wands and attachments – Durable.
Technician Field Notes
- “I’ve had customers bring this vacuum back after one use saying ‘I can’t push it.’ It’s not broken—it’s designed that way.”
- “The power brush tools are the biggest profit center. They fail, you buy another. We see it constantly.”
- “When I see a dust cup with internal vanes, I know the owner will be digging debris out with a stick within months.”
- “The tipping hazard is real. We’ve had two fall-related injuries reported.”
- “Attachments that fall off when you pull back? That’s not a defect—it’s a design that wasn’t tested in reverse.”
- “We don’t repair these for ergonomic issues. You can’t fix ‘too hard to push’ with a part.”
- “The best vacuum is the one you can actually move. Test it in the store on carpet before you buy.”
Heavy-Use User Reality
For users vacuuming daily with pets, thick carpet, or large homes:
- Expect physical strain from pushing.
- Power brushes will fail every 3-6 months.
- Dust cup will require manual cleaning weekly.
- Tipping incidents likely.
- Total cost of ownership: $250 unit + $100/year in replacement tools + your physical labor = high.
Recommendation for heavy use: Avoid this design. Choose a vacuum with adjustable suction, positive-lock tools, and a simple dust cup. Test on carpet before purchase.
Hidden Ownership Cost Analysis
Consumables:
- Power brush tools: $30-60 every 3-6 months.
- Belts: $5-10 every 6-12 months.
- Filters: $10-20 every 3-6 months.
- Attachments: $10-30 as they break.
Maintenance Parts:
- Main motor: $50-100 (if available, DIY install).
- Switches: $5-15 (if available).
Downtime:
- Tool failure: 3-7 days for replacement.
- Motor failure: unit scrap.
Service Labor:
- DIY: 15 minutes to 2 hours.
- Professional: $100-200 = not economical.
Accessory Lock-in:
- Proprietary tools force brand purchase.
- Non-standard wand diameter prevents using universal tools.
True 3-Year Cost (Average Use):
- Purchase: $250
- 2 power brush replacements: $60 x 2 = $120
- 4 filter sets: $15 x 4 = $60
- 2 belts: $8 x 2 = $16
- Total: $446 over 3 years, or $149/year, plus significant physical effort.
Compare to quality canister vacuum with adjustable suction: $400 purchase, minimal consumables, lasts 10 years = $40/year, and you can actually push it.
Early Warning Signs Before Major Failure
Performance Drift:
- Harder to push over time (carpet fibers compacting?).
- Suction seems weaker (partial clog in dust cup).
- Takes longer to clean same area (narrow head).
Noise Changes:
- Power brush screeching (bearing wear, hair wrap).
- Main motor louder (restricted airflow, bearing wear).
- Rattling (loose parts from tipping).
Heat Increase:
- Motor housing hot (restricted airflow).
- Power brush warm (overwork).
Visual Cues:
- Dust visible in exhaust (filter bypass).
- Debris trapped in dust cup (won’t empty).
- Cracks in plastic from tipping.
- Attachments loose (wear).
Error Frequency:
- Tools fall off more often (retention wear).
- Toe-release unreliable (mechanism wear).
Final Risk Rating
| User Type | Risk Level | Primary Failure Mode | Recommendation |
|---|---|---|---|
| Light User (hard floors, 1x/week) | Medium | Dust cup annoyance, occasional attachment issues | Acceptable only if you have no carpet. |
| Average User (some carpet, 2x/week) | High | Carpet locking, physical strain, tool failures | Avoid. Usability issues will dominate. |
| Heavy User (daily, thick carpet, pets) | Very High | Power brush failure, back strain, tipping hazard | Not suitable. Choose different design. |
| Staircase User | Extreme | Tipping hazard, fall risk | Do not use on stairs. |
Conditional Verdict:
- If you buy this vacuum and have medium-to-high pile carpet, you will likely be unable to use it effectively. The suction locking is not a defect—it’s a design feature that should have been tested.
- The power brush tools are consumable items. Budget for replacements.
- The dust cup will require manual cleaning. If you are not willing to dig debris out with tools, this vacuum will frustrate you.
- The tipping hazard is real. Use with caution, especially on stairs.
Field Note: The most reliable vacuum is often the one with adjustable suction, a simple dust cup, and attachments that click into place. This model prioritizes marketing power specs over real-world usability. Test before you buy, and if you cannot push it in the store, you will not be able to push it at home.