
This guide is built from field failure data: repair logs, teardown analysis of failed toasters, and long-term performance degradation patterns. We ignore marketing claims about “perfect browning” or “wide slots.” Instead, we judge a toaster by what fails first: its magnetic carriage latch, its heating element uniformity, and its basic auto-shutoff function. The goal is to provide the engineering logic you need to reject the majority of modern toasters that are engineered for obsolescence, not durability.
Buyer Protection Summary
Most modern toasters fail not because of heating speed or features, but due to predictable mechanical and thermal design weaknesses. This guide focuses on the failure modes that actually end a toaster’s usable life—carriage latch failure, uneven heating element degradation, and thermostat instability—so buyers can eliminate unsafe, disposable designs before purchase.
Most Common Buyer Mistakes
Mistake 1: Choosing Based on Slot Count and Width Over Carriage Mechanism
Buyers focus on “4-slice” or “extra-wide” but never ask about the mechanism that holds the bread down. This is the single most common point of failure in modern toasters. The failure outcome is Failure Mode 5 (Magnetic Latch/Carriage Lock Failure). A weak or poorly positioned electromagnet will fail to engage, causing the lever to pop up immediately, rendering the toaster useless.
Mistake 2: Assuming “High-End” Exterior Finishes Indicate Internal Quality
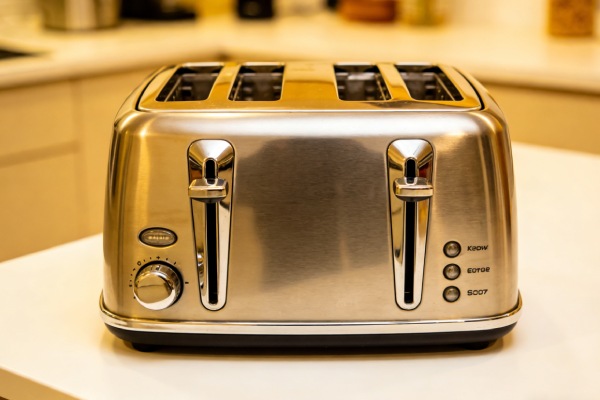
Buyers pay a premium for brushed stainless steel or colorful housings, assuming it correlates with better internal components. In reality, the chassis is often the same thin-gauge steel, and the expensive electronics inside are identical to budget models. The failure outcome is identical Failure Mode 1 (Uneven Toasting) and Mode 13 (Long-Term Reliability Degradation), just with a nicer shell.
Mistake 3: Prioritizing Digital Controls and Presets Over Simplicity
Buyers are drawn to LED displays, bagel buttons, and frozen pastry settings. These add a complex, moisture-vulnerable control board to a simple thermal appliance. The failure outcome is Failure Mode 12 (Control Interface Malfunction). A $5 mechanical bimetallic thermostat is more reliable than a $30 digital control board that can fail from steam or a power surge.
Mistake 4: Ignoring the Physical Geometry of the Slot and Carriage
Buyers don’t test if the carriage lifts the bread high enough for safe removal or if the slot length accommodates their bread. The failure outcome is Failure Mode 8 (Slot Depth Too Deep) and Mode 9 (Slot Length Too Short). This forces users to burn their fingers retrieving toast or results in overlapping, untoasted bread—both fundamental design failures.
Marketing Claims That Mislead Buyers
- “Even-Heat Technology”: A trademarked term, not a technical specification. It distracts from the actual construction of the heating element. True even heating comes from properly spaced, fully connected nickel-chromium filaments, not marketing.
- “Lift-and-Look”: A feature that interrupts toasting to check bread. This introduces a mechanical interrupt switch that is a common failure point and adds unnecessary complexity to the carriage.
- “Cool-Touch Exterior”: Achieved with a thin layer of plastic or a double-wall design that can trap heat and moisture, potentially degrading internal components faster.
- “Wide Slots for Bagels & Artisan Bread”: Focuses on width but ignores slot length and carriage lift height. A wide slot is useless if the bread doesn’t fit lengthwise or you can’t remove it safely.

Specs That Matter vs. Specs That Don’t
Specs That Matter (And Are Almost Never Published):
- Carriage Latch Mechanism Type: Is it an electromagnetic latch or a mechanical (notched) latch? Electromagnetic is more common but far more prone to failure from crumb interference or magnet weakening. A mechanical latch is simpler and more reliable.
- Heating Element Filament Gauge and Attachment: Thicker nickel-chromium wire lasts longer. The filaments should be welded or crimped to the support brackets, not simply hooked on, which leads to hot spots and breaks (Failure Mode 1).
- Bimetallic Thermostat Calibration Range: The heart of the timer. A wider, more adjustable range allows for finer control. Its quality determines Failure Mode 2 (Poor Control) and Mode 3 (Auto Shut-Off Failure).
- Carriage Lift Height: The distance the carriage raises the bread above the slot rim. Should be at least 1.5 inches for safe finger clearance. Unpublished, but critical for safety.
Specs That Don’t (The Inflated Distractions):
- Number of Browning Settings: 7 vs. 5 settings is meaningless if the thermostat is imprecise.
- “Defrost” and “Reheat” Buttons: These are just pre-programmed timer extensions on the same thermostat. They add complexity without real function.
- Crumb Tray Size: Easy access is good, but a large tray doesn’t prevent crumbs from interfering with the internal latch (Failure Mode 6).
- Wattage: While related to speed, higher wattage with poor element design just means faster, less even toasting.
Build Quality Signals
- Weight and Lever Feel: A heavier toaster often indicates a more substantial metal chassis and internal frame. The lever should descend smoothly with a solid, damped feel, not a light, springy action.
- Carriage Stability: Push the lever down. The carriage (the bread holder) should not wobble side-to-side. Wobble indicates poor guide rail construction that leads to misalignment and uneven toasting.
- Slot and Element Visibility: Look down the slots (unplugged). The heating elements should be symmetrically placed and visibly identical on both sides. Look for broken or sagging filaments.
- Control Knob Action: Turn the darkness control. It should have a distinct, positive click at each setting, not a smooth, vague rotation. Clicks indicate a mechanical cam interacting with the thermostat, offering repeatability.
Reliability Indicators
- Mechanical, Notched Carriage Latch: A simple hook-and-notch system to hold the lever down is more reliable long-term than an electromagnetic system vulnerable to power fluctuations and crud.
- Separate, Replaceable Heating Elements: Each heating element should be a distinct unit attached with screws or clips, not welded or riveted into the frame. This allows replacement if one side fails.
- Accessible and Cleanable Latch Area: The magnetic solenoid or mechanical latch should be behind a removable panel for cleaning, not buried under the chassis.
- Single, Robust Control Knob: A simple timer/thermostat controlled by one knob has the fewest failure points.
Hidden Ownership Costs
- Consumables: None, if well-designed. But a poor design turns bread into “consumable” via waste from uneven toasting.
- Maintenance: Frequent, careful crumb cleaning is required for units with sensitive magnetic latches. Failure to do so guarantees Failure Mode 6.
- Replacement Part Availability: Heating elements and control knobs/thermostats are rarely sold. The entire unit is typically replaced upon failure.
- Energy Inefficiency: A toaster with failing elements or a sticking carriage will require multiple cycles, wasting electricity.
- Downtime & Inconvenience: A failed toaster is a daily nuisance. The “cheap replacement” cycle costs more over time than one durable purchase.
When Cheaper Is Actually Worse
In toasters, low cost is achieved through specific, failure-prone compromises:
- Thin-Gauge Heating Elements: Use thinner nickel-chromium wire that burns out or breaks quickly, causing Failure Mode 1.
- Weak or Unshielded Electromagnet: The solenoid is undersized and placed directly in the crumb path. It fails within 12-18 months (Failure Mode 5).
- Poorly Calibrated Bimetallic Thermostat: Made with cheap metals, leading to inconsistent timing and Failure Mode 2 & 3.
- Flimsy Carriage Guide Rails: Made of thin bent metal, they warp from heat, causing the carriage to stick or eject erratically (Failure Mode 7 & 11).
- Shallow Carriage Lift: Saves on spring size, creating the burn hazard of Failure Mode 8.
When Premium Is Justified
A higher price is only justified if it buys tangible engineering that prevents the core failure modes:
- A Mechanical, Notched Carriage Latch: Eliminates the #1 failure point (the electromagnet).
- User-Replaceable, Individually Wired Heating Elements: Allows repair of the #2 failure point.
- A High-Quality, Adjustable Bimetallic Thermostat: For consistent control.
- A Full-Height Carriage Lift: For safe food retrieval.
- A Simple, Single-Knob Control Interface: Minimizes electronic failure points.
If the premium price only buys digital displays, special bagel settings, or a “designer” housing, it is not justified.
Pre-Purchase Inspection Checklist
In-Store / Physical Inspection:
- Test the lever mechanism repeatedly. Push it down at least 10 times. It must engage and hold 100% of the time without hesitation. Any single failure is a reject.
- Measure the carriage lift height. Push the lever down and let it rise naturally. Use your fingers or a ruler. If the bread platform doesn’t rise at least 1.5 inches above the top of the slot, it’s a burn risk.
- Check for carriage wobble. With the lever up, grasp the bread carriage and gently try to wiggle it side-to-side and front-to-back. Any noticeable play indicates poor guides.
- Inspect the heating elements. Look down the slots. Do all the wires glow evenly when you do a quick test? Are any broken, sagging, or different between slots?
- Feel the control knob. Turn it through its range. It should have distinct, tactile clicks, not smooth, vague motion.
Online Research (Before Buying):
- Search for “[Model Number] lever won’t stay down”. This is the most common failure. Read the experiences.
- Search for “[Model Number] uneven toasting”. Look for patterns, not isolated complaints.
- Search for “teardown” or “repair [Brand] toaster” on YouTube. See how it’s built inside. Look for an electromagnet or a mechanical latch.
- Ignore “feature” reviews. Focus your reading on “stopped working after” and “long-term reliability” comments.
Decision Framework
- Classify Your Usage: Are you a light user (a few slices per week), a family user (daily, multiple slices), or a heavy user (frequent bagels, thicker breads)? For family or heavy use, a mechanical latch and replaceable elements are critical.
- Apply Elimination-First Logic:
- Eliminate any toaster where the lever fails to engage and hold consistently during in-store testing.
- Eliminate any toaster with a carriage lift height less than 1.5 inches.
- Eliminate any toaster where the heating elements are not visibly symmetrical and intact.
- Eliminate any toaster with a digital display or touch controls. Opt for a single mechanical knob.
- Reinforce Long-Term Value: A $30 toaster that fails in 18 months costs $20 per year. A $100 toaster that lasts 15 years costs $6.67 per year and doesn’t leave you with burnt fingers or wasted bread.
- Final Protective Buying Rule:
Only consider a toaster with a mechanical (notched) carriage latch, a carriage that lifts bread at least 1.5 inches above the slot rim, and visibly symmetrical, intact heating elements. If you cannot verify all three conditions through physical inspection before purchase, you are likely buying an appliance with a predetermined, non-repairable failure point that will render it useless within a few years. Durability in a toaster is about mechanical simplicity, not electronic complexity.