
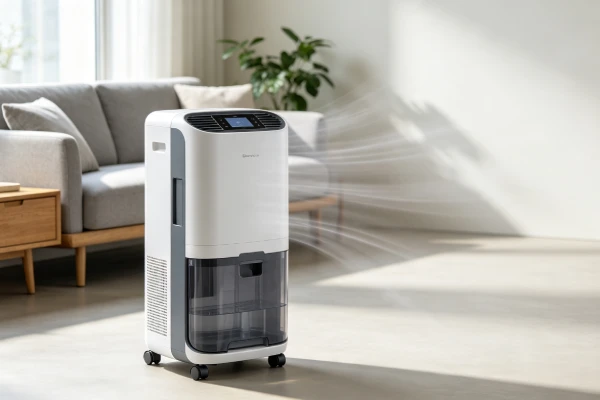
If your Frigidaire dehumidifier needs repair, the fastest path is usually the error code on the display. Frigidaire uses a specific error-code system — EC, FO, E1, E2, E3, LO — and each code points to a different repair path and a different repair cost.
This guide focuses on:
- Frigidaire error codes and what they mean for repair decisions
- Common Frigidaire dehumidifier failures
- Frigidaire dehumidifier repair cost ranges
- When repair makes sense and when replacement is the better choice
If you have not diagnosed the problem yet, start with our Frigidaire Dehumidifier Troubleshooting: Complete Guide. That guide tells you what is wrong. This guide tells you how to fix it and whether it is worth fixing.
⚠️ Safety warning: If the unit trips a breaker, smells like burning, has visible electrical damage, or shows melted wiring, unplug it immediately. Do not continue using it until it has been inspected by a qualified technician.
Evidence, Source, and Scope Note
The error-code definitions, repair patterns, and cost ranges on this page are based on:
- Frigidaire dehumidifier user manuals and error-code documentation
- General field observations of Frigidaire residential dehumidifiers
- Owner reports tied to Frigidaire dehumidifier models
They are not manufacturer repair-price specifications and are not generalized from other brands.
Scope: This guide applies to Frigidaire residential dehumidifiers. Error-code meanings, sensor types, and repair paths can differ by model and production year. Always confirm against your model manual.
Repair prices vary significantly by region, model, and service provider. Confirm locally before authorizing a repair.
Frigidaire Dehumidifier Repair: Start Here
| Symptom / Display | Likely Area | First Action | Full Guide |
|---|---|---|---|
| No lights, no display | Power or control | Check outlet, GFCI, breaker, cord | Diagnose |
| Beeps and won’t restart | Control lock-up | 5-minute reset | See reset section |
| EC code | Compressor / sensor | 5-minute reset first | Frigidaire Dehumidifier EC Code |
| FO code | Compressor / fan / sensor | 5-minute reset first | Frigidaire Dehumidifier FO Code |
| E1 / E2 | Temperature sensor | Sensor check | See E1 / E2 section |
| E3 | Humidity sensor | Sensor check | See E3 section |
| LO | Low temperature | Move to warmer location | See LO section |
| Fan runs, no water | Airflow, fan, or refrigeration | Check airflow and capacitor | Diagnose |
| Compressor hums, won’t start | Capacitor or start circuit | Test capacitor | Repair |
| Warm air, no water | Compressor / sealed system | Confirm compressor | Often replace |
| Overflows | Float sensor | Clean float sensor | Repair |
| No auto-restart after outage | Design limitation on many models | Press power button | Workaround |
Start here: If there is an error code, treat the code as the first diagnostic clue. Do not jump to compressor replacement before ruling out the simpler causes behind that code.
Frigidaire Error Codes That Change the Repair Diagnosis
This is the core of the Frigidaire repair page. Error codes change the repair path, the first test, and the repair cost.
EC — Compressor / Sensor Error
What you see: The display shows EC.
When it appears: Often after a power interruption, a full-tank condition, a compressor start attempt, or a sensor fault. On many Frigidaire models, EC is a general compressor-related error that can be triggered by multiple causes.
First action:
- Perform a 5-minute reset — unplug for 5 full minutes, plug back in, press power.
- Check the tank and float sensor.
- Confirm airflow and filter condition.
- If the code returns, check the capacitor and the compressor start circuit.
How to verify:
| Possible cause | How to verify |
|---|---|
| Reset / lock-up | 5-minute reset clears the code |
| Capacitor | Compressor hums but won’t start |
| Sensor | Unit reading differs from external hygrometer |
| Compressor | No hum, no cooling after capacitor is confirmed good |
Do not:
- Do not replace the compressor before testing the capacitor.
- Do not replace the control board before confirming power and sensor inputs.
- Do not assume EC means the compressor has failed.
When to move to professional repair: If the reset does not clear the code and the capacitor is good, a technician should test the compressor and control board.
Full guide: Frigidaire Dehumidifier EC Code: Causes & Fixes
FO — Compressor / Fan / Sensor Error
What you see: The display shows FO.
When it appears: Often on startup, after a power interruption, or when the unit detects an abnormal condition in the compressor, fan, or sensor circuit. On many Frigidaire models, FO overlaps with EC in meaning.
First action:
- Perform a 5-minute reset.
- Check the fan for free rotation.
- Check the filter and airflow.
- Check the float sensor.
- If the code returns, check the capacitor and control board inputs.
How to verify:
| Possible cause | How to verify |
|---|---|
| Reset / lock-up | 5-minute reset clears the code |
| Fan | Fan blade does not spin freely by hand |
| Filter / airflow | Filter clogged or vent blocked |
| Capacitor | Compressor hums but won’t start |
| Control board | Code returns immediately after reset, fan and capacitor confirmed good |
Do not:
- Do not assume FO means the compressor has failed.
- Do not replace the fan motor without confirming it is seized.
- Do not skip the reset step.
When to move to professional repair: If FO returns after reset and after confirming fan, filter, and float sensor are good, a technician should test the capacitor, compressor, and control board.
Full guide: Frigidaire Dehumidifier FO Code: Causes & Fixes
E1 / E2 — Temperature Sensor Errors
What you see: The display shows E1 or E2.
When it appears: On many Frigidaire models, when the unit detects an out-of-range reading from a temperature sensor — often the coil or ambient temperature sensor. Check your model manual, as code definitions can vary.
First action:
- Unplug for 5 minutes and restart.
- Confirm the unit is not in a very cold environment.
- Check the sensor connector for corrosion or loose contact.
- If the code returns, the temperature sensor or board input may be faulty.
How to verify:
| Possible cause | How to verify |
|---|---|
| Low ambient temperature | Move unit to warmer location; code clears |
| Loose connector | Reseat sensor connector; code clears |
| Sensor drift | Reading differs from known reference |
| Board input fault | Code returns with new sensor installed |
Typical decision: Repair. Temperature sensor replacement is usually a moderate-cost repair.
E3 — Humidity Sensor Error
What you see: The display shows E3.
When it appears: On many Frigidaire models, when the humidity sensor reading is out of range or the sensor circuit is faulty. Check your model manual.
First action:
- Unplug for 5 minutes and restart.
- Compare the unit’s humidity reading with an external hygrometer.
- Clean the sensor area if accessible.
- If the code returns, sensor or board replacement may be needed.
How to verify:
| Possible cause | How to verify |
|---|---|
| Reset / lock-up | 5-minute reset clears the code |
| Sensor drift | Reading differs from external hygrometer by more than 10% RH |
| Sensor contamination | Cleaning sensor area clears the code |
| Board input fault | Code returns with new sensor installed |
Typical decision: Repair if the unit is under about 2 years old. Evaluate on older units.
LO — Low Temperature
What you see: The display shows LO.
When it appears: On many Frigidaire models, when the ambient temperature is too low for the unit to operate correctly. This is often a workaround, not a repair.
First action:
- Move the unit to a warmer location.
- Confirm the operating temperature range in your model manual.
- Do not attempt to force operation below the rated range.
How to verify:
| Possible cause | How to verify |
|---|---|
| Ambient temperature below range | Code clears after moving to a warmer location |
| Sensor fault | Code persists in a warm location |
| Board input fault | Code returns after sensor is confirmed good |
Typical decision: Workaround. No repair needed in most cases.
Frigidaire Dehumidifier Models and Repair Differences
Do not assume every Frigidaire dehumidifier uses the same control system or the same repair path. Differences across models can change the diagnosis.
| Difference | What It Can Affect |
|---|---|
| Capacity: 20 / 35 / 50 / 70 pint | Compressor size, fan load, moisture removal rate |
| Control panel generation | Error-code set, reset procedure, sensor type |
| Drainage design | Bucket vs continuous drain; gravity vs pump |
| Pump vs non-pump | Drain fault diagnosis, error codes |
| Older vs newer models | Firmware behavior, sensor supplier, board availability |
| Auto-restart behavior | Behavior after power outage |
Why this matters: Different Frigidaire generations may use different sensor types, control board firmware, and error-code definitions. The same EC or FO code on two different Frigidaire models may point to different first tests and different repair decisions. Drainage design and pump presence also change how drain-related symptoms are diagnosed.
Always identify your model number before following an error-code guide.
Frigidaire Dehumidifier Repair Cost
Repair prices vary by region, model, and service provider. The ranges below are typical field-observation ranges and should be confirmed locally.
| Repair | Typical Cost Range | Labor Difficulty | When Repair Makes Sense |
|---|---|---|---|
| 5-minute reset | $0 | None | Always try first |
| Filter cleaning / replacement | Low | Low | Almost always |
| Float sensor cleaning | Low | Low–Medium | Usually |
| Float sensor replacement | Low–Medium | Low–Medium | Usually |
| Run capacitor replacement | Low–Medium | Medium | Often |
| Fan motor replacement | Medium | Medium | Depends on unit age |
| Humidity / temperature sensor | Medium | Medium | Depends on unit age |
| Control board replacement | Medium–High | Medium–High | Model dependent |
| Compressor / sealed system | High | High | Often replace unit |
Note on prices: These ranges are general field-observation ranges, not manufacturer pricing. Repair prices vary significantly by region, model, and service provider. Confirm locally before authorizing a repair. Do not assume Frigidaire repair prices match other brands.
60% rule: If the quoted repair cost — parts plus labor, including any diagnostic fee — approaches 60% of the current price of a comparable new unit in your region, replacement may be more practical. “Comparable new unit” means a new dehumidifier of the same capacity and similar features in your region, not the lowest-priced unit on the market.
Also factor in parts availability, warranty status, and the risk of water damage while the unit is down.
Is a Frigidaire Dehumidifier Worth Repairing?
Under 2 Years Old
- Check the warranty first.
- If under warranty, do not repair yourself — claim warranty.
- If not under warranty, prioritize:
- Parts availability
- Repair cost vs the 60% threshold
- Whether the repair is simple (reset, sensor, capacitor) or major (compressor, sealed system)
Typical decision: Repair is usually worth it if the fault is a sensor, capacitor, float, or reset issue.
2–4 Years Old
- Evaluate based on:
- Repair cost
- Model condition
- Compressor status
- Parts availability
- Fan motor and control board repairs should be evaluated carefully.
- Sensor and capacitor repairs are usually still worth it.
Typical decision: Repair if the fault is low-cost and the unit is in good condition. Replace if the fault is major.
Older Unit
- Focus on:
- Compressor or sealed system failure
- Control board availability
- Fan motor condition
- Replacement cost
- If the compressor has failed or the control board is discontinued, replacement is usually the better choice.
- As a general guide, if the unit is more than about 4 years old and the control board repair approaches 60% of a comparable new unit, replacement is usually the better choice.
Typical decision: Replace for major faults. Repair only for low-cost faults on a unit in otherwise good condition.
Common Frigidaire Dehumidifier Failures
| Failure | Typical Symptom | First Check | Typical Decision |
|---|---|---|---|
| Fan motor seizure | Fan not spinning; no water | Manual fan spin | Usually repairable |
| Capacitor failure | Compressor hums, won’t start | Test capacitor | Repair |
| Humidity sensor drift | Runs continuously | Compare with hygrometer | Repair |
| Float sensor scale | Overflow; false full | Clean float | Repair |
| Control lock-up | Beeps, won’t restart | 5-minute reset | Usually free fix |
| Control board failure | Fan runs, compressor silent | Reset first | Usually replace on older units |
| Compressor failure | Warm air, no water | Confirm capacitor first | Usually replace |
| No auto-restart | Off after power outage | Press power button | Workaround |
Start here: Rule out airflow, starting components, sensors, and controls before condemning the compressor. The compressor is often suspected first but is frequently not the root cause.
These patterns are general field-observation ranges, not manufacturer specifications. Actual failure timing varies by model, usage, environment, and maintenance.
Diagnostic Decision Tree
Step 1: Does the unit have power?
- No → Try 5-minute reset. If still dead, check control board.
- Yes → Go to Step 2.
Step 2: Is there an error code?
- EC or FO → 5-minute reset first. If it persists, follow the EC / FO guide.
- E1 / E2 / E3 → Sensor diagnosis.
- LO → Move to warmer location.
- No code → Go to Step 3.
Step 3: Is water being collected?
- No → Go to Step 4.
- Yes → Unit is working. Check other issues.
Step 4: Check the fan.
- No airflow → Check filter first. If clean, fan motor may be seized.
- Airflow present → Go to Step 5.
Step 5: Listen for compressor hum.
- Hum but no start → Capacitor may have failed.
- Silent → Control board or power issue.
- Starts but no cooling → Compressor or sealed system. Often replace.
This sequence identifies most Frigidaire repair cases without opening the unit.
DIY Repairs You Can Do Yourself
1. 5-Minute Power Reset
Symptom: Unit beeps and won’t restart; error code; unresponsive after full-tank error.
What to do:
- Unplug the unit for 5 full minutes.
- Plug it back in and press the power button.
- If it starts, the issue was a temporary control lock-up. No repair needed.
Cost: $0.
Note: This is a free first step. It resolves many restart issues and some EC / FO display states.
2. Filter Cleaning or Replacement
Symptom: Weak airflow; unit runs longer; coil may freeze.
What to do:
- Unplug the unit.
- Remove the filter.
- Rinse if washable. Let it dry completely.
- Reinstall. Replace if broken.
Cost: Low.
Note: Frigidaire filters are often fragile. Handle with care.
3. Float Sensor Cleaning
Symptom: Unit overflows; false-full errors.
What to do:
- Unplug the unit.
- Remove the tank.
- Locate the float mechanism.
- Manually lift the float. If stiff or stuck, scale is likely.
- Soak the float and pivot area in white vinegar for 1–2 hours.
- Rinse and reinstall.
Cost: Low.
If the float still does not move freely after cleaning, sensor replacement may be needed.
4. External Hygrometer Check
Goal: Determine whether the humidity sensor is drifting.
What to do:
- Place an external hygrometer next to the unit.
- Wait 30 minutes.
- Compare readings.
- If the difference is greater than 10% RH, the sensor may be drifting.
Cost: Low.
Note: This is a diagnostic step, not a repair.
5. LO Code Workaround
Symptom: LO displayed.
What to do:
- Move the unit to a warmer location.
- Confirm the operating temperature range in your model manual.
- Do not force operation below the rated range.
Cost: $0.

Professional Repairs
Fan Motor Replacement
Symptom: Fan not spinning; grinding noise before failure; no water collected.
Why it happens: Many Frigidaire dehumidifiers use sleeve bearing fan motors. Bearing lubricant can degrade under continuous operation, especially in dusty environments. The fan seizes, stopping airflow.
Typical cost: Medium. Confirm locally.
Worth it? If the unit is under about 2 years old and the repair is below the 60% threshold, repair is often worth it. On older units, compare against the current price of a comparable new unit.
Run Capacitor Replacement
Symptom: Fan runs; compressor hums but won’t start.
Why it happens: Heat and age degrade capacitance. The compressor cannot get the phase shift it needs to start.
Typical cost: Low–Medium. Confirm locally.
Worth it? Often yes. This is usually the most cost-effective repair.
Safety note: Capacitors can hold a dangerous electrical charge even after the unit is unplugged. Do not attempt capacitor replacement unless you are qualified to discharge and test capacitors safely.
Humidity or Temperature Sensor Replacement
Symptom: E1 / E2 / E3 error code; unit runs continuously; readings do not match an external hygrometer.
Why it happens: The sensor element can drift or fail due to contamination, aging, or moisture.
Typical cost: Medium. Confirm locally.
Worth it? Sensor replacement is usually worth it on units under about 2 years old. Board-level repairs should be evaluated against the 60% threshold.
Control Board Replacement
Symptom: Fan runs; compressor completely silent; 5-minute reset did not work; error code returns immediately.
Why it happens: Control board components degrade. The board fails to send power or process sensor inputs correctly.
Typical cost: Medium–High. Confirm locally.
Worth it? Model dependent. As a general guide, if the unit is more than about 4 years old and the control board repair approaches 60% of a comparable new unit, replacement is usually the better choice.
Compressor Replacement
Symptom: Unit runs; warm air; no water; confirmed compressor failure.
Why it happens: Fan failure or capacitor failure can cause thermal damage. Refrigerant loss is another cause.
Typical cost: High. Confirm locally.
Worth it? Usually not. Confirm the capacitor is good and the unit is not simply in a lock-up state before condemning the compressor. Replacement is typically the better choice.
Field Verification Tests
Test 1: Power Reset Test
- Time: 5 minutes
- Tools: None
Steps:
- Unplug the unit for 5 full minutes.
- Plug in and restart.
- Check if the unit works.
Decision:
- Unit works → Temporary issue. No repair needed.
- Still not working → Proceed to error-code or airflow check.
Test 2: Error Code Check
- Time: 1 minute
- Tools: None
Steps:
- Note the exact error code.
- Check the Frigidaire error-code section above.
- Follow the corresponding guide.
Decision:
- EC or FO → 5-minute reset first.
- E1 / E2 / E3 → Sensor diagnosis.
- LO → Move to warmer location.
Test 3: Airflow / Fan Check
- Time: 1 minute
- Tools: None
Steps:
- Set the unit to continuous mode.
- Place your hand over the air outlet.
- Feel for strong, steady airflow.
Decision:
- Strong airflow → Fan is working. Check other causes.
- Weak or no airflow → Check filter first. If clean, fan motor may be seized.
Test 4: Compressor Hum Check
- Time: 1 minute
- Tools: None
Steps:
- Turn the unit on.
- Listen near the back or bottom.
- Listen for a humming sound.
Decision:
- Humming present → Capacitor may have failed.
- No humming → Control board or power issue.
Test 5: Manual Fan Spin Test
- Time: 5 minutes
- Tools: May need access panel
Steps:
- Unplug the unit.
- Remove the front grille or access panel.
- Locate the fan blade.
- Gently spin it with your finger.
Decision:
- Spins freely → Motor electrical issue — capacitor or board.
- Stiff or won’t spin → Bearing seizure — fan motor replacement likely.
Test 6: External Hygrometer Comparison
- Time: 30 minutes
- Tools: External hygrometer
Steps:
- Place the hygrometer next to the unit.
- Wait 30 minutes.
- Compare readings.
Decision:
- Difference greater than 10% RH → Sensor may be drifting.
- Readings match but unit misbehaves → Check control board or compressor.
Common Misdiagnosis Patterns
Misdiagnosis 1: “Compressor failed; replace unit”
| Item | Detail |
|---|---|
| Symptom | Unit runs but no water collected |
| Wrong conclusion | Compressor failure; replacement needed |
| True root cause | Fan motor seized or capacitor failed — compressor may be fine |
| Correct repair | Fan motor or capacitor replacement |
Note: The compressor is often suspected first, but airflow, starting components, sensors, and controls should be ruled out before condemning the compressor.
Misdiagnosis 2: “Control board failed; replace board”
| Item | Detail |
|---|---|
| Symptom | Unit won’t restart; beeping |
| Wrong conclusion | Control board replacement |
| True root cause | Control lock-up during reset |
| Correct repair | 5-minute reset |
Misdiagnosis 3: “Low refrigerant; sealed system repair”
| Item | Detail |
|---|---|
| Symptom | Unit runs continuously; minimal water |
| Wrong conclusion | Refrigerant leak; sealed system repair |
| True root cause | Filter clogged; evaporator coil frozen |
| Correct repair | Filter cleaning; thaw coil |
Misdiagnosis 4: “Full-tank sensor bad; replace tank”
| Item | Detail |
|---|---|
| Symptom | False-full errors or overflow |
| Wrong conclusion | Tank assembly replacement |
| True root cause | Mineral scale on float pivot |
| Correct repair | Vinegar cleaning |
Misdiagnosis 5: “EC or FO means compressor failure”
| Item | Detail |
|---|---|
| Symptom | EC or FO code on display |
| Wrong conclusion | Compressor has failed; replace unit |
| True root cause | Reset issue, capacitor, sensor, airflow, or control board |
| Correct repair | Reset, capacitor, sensor, or board — diagnose in order |
Real-World Repair Scenarios
Scenario 1: The EC Code After a Power Outage
Situation: Unit shows EC after a brief power outage. Unit beeps and won’t restart.
What happened: Control lock-up during power interruption.
Fix: 5-minute reset. Unit starts. Cost: $0.
Alternative if misdiagnosed: Compressor or board replacement.
Lesson: Always reset before assuming EC means compressor failure. See the EC section for the full verification path.
Scenario 2: The FO Code With a Seized Fan
Situation: Unit shows FO. Fan not spinning.
What happened: Fan motor seized. FO triggered by abnormal fan condition.
Fix: Fan motor replacement.
Alternative if misdiagnosed: Compressor repair.
Lesson: Check the fan before condemning the compressor. See the FO section.
Scenario 3: The Capacitor Failure
Situation: Unit has power; fan runs; compressor hums but won’t start.
What happened: Capacitor degraded and lost capacitance.
Fix: Capacitor replacement.
Alternative if misdiagnosed: Compressor repair.
Lesson: Capacitor replacement is often the most cost-effective repair.
Scenario 4: The Control Board Dilemma
Situation: Unit has power; fan runs; compressor silent; 5-minute reset did not work.
What happened: Control board failure.
Fix decision: Compare control board repair cost against the 60% threshold. On older units — generally over about 4 years — replacement is usually more practical.
Lesson: Control board repair on older units is often not worth it.
Scenario 5: The E3 Humidity Sensor Drift
Situation: Unit runs continuously; never reaches setpoint; E3 displayed.
What happened: Humidity sensor drift.
Fix: Sensor or board replacement, depending on model.
Lesson: Compare with an external hygrometer before replacing the sensor.
Why Failure Happens
Fan Motor Seizure
- Component: Sleeve bearing motor
- Cause: Lubricant degrades; no oil ports
- Trigger: 24/7 operation; dusty environments
- Consequence: No airflow → no dehumidification → compressor damage risk
Run Capacitor Failure
- Component: Electrolytic capacitor
- Cause: Heat degrades capacitance
- Trigger: Continuous operation; heat exposure; age
- Consequence: Compressor hums but won’t start
Control Lock-Up
- Component: Microcontroller / control board
- Cause: Unplugging while sensor is active can cause an undefined state
- Trigger: Unplugging during full-tank condition
- Consequence: Unit beeps and won’t restart; may show EC or FO
Humidity Sensor Drift
- Component: Polymer-based humidity sensor
- Cause: Contaminant absorption causes resistance shift
- Trigger: Dust; VOCs
- Consequence: Continuous running → higher energy bills; may show E3
No Auto-Restart
- Component: Control board — no power-loss detection
- Cause: Manufacturer omitted components on many models
- Trigger: Any power interruption
- Consequence: Unit stays off until manual intervention. If pressing power starts it, this is normal model behavior, not a repair issue. Check your model manual.
Full-Tank Sensor Scale
- Component: Mechanical float switch
- Cause: Mineral scale accumulates on pivot
- Trigger: Hard water; lack of cleaning
- Consequence: False shutdown or overflow
Usage Patterns That Accelerate Repair Needs
| Usage Pattern | What It Accelerates |
|---|---|
| 24/7 operation | Fan bearing failure, capacitor degradation |
| Hard water | Float sensor scale |
| Dusty environment | Filter clogging, fan bearing wear |
| Power-unstable areas | Control board failures, no auto-restart frustration |
Maintenance Traps Sellers Don’t Mention
- The filter needs cleaning or replacement every 3–6 months.
- The float sensor needs descaling every 3–4 months in hard water areas.
- Frigidaire filters are fragile. Handle with care.
- Control lock-up is common. The 5-minute reset is the fix.
- Many Frigidaire dehumidifiers do not auto-restart after a power outage. Check your model manual.
- Frigidaire parts availability is moderate. Check before committing to major repairs.
Realistic Service Life Expectation
| Usage Intensity | Median Lifespan | Typical Repairs (3 Years) |
|---|---|---|
| Light (seasonal) | 30–40 months | Sensor drift |
| Medium (daily, 8–16 hrs) | 16–22 months | Fan motor + sensor |
| Heavy (24/7 continuous) | 8–12 months | Fan motor + board |
These ranges are based on general field observations and owner reports for Frigidaire dehumidifiers. They are not manufacturer specifications and should not be treated as guaranteed lifespans. Actual results vary by model, environment, and maintenance.
Repair Difficulty and Cost Reality
| Component | Difficulty | Labor Time | Typical Cost Range |
|---|---|---|---|
| 5-minute reset | Easy | 5 min | $0 |
| Filter cleaning | Easy | 5 min | Low |
| Float sensor cleaning | Easy | 30–60 min | Low |
| Fan motor replacement | Moderate | 1–2 hours | Medium |
| Capacitor replacement | Moderate | 30–60 min | Low–Medium |
| Sensor / board replacement | Difficult | 1–1.5 hours | Medium |
| Control board replacement | Difficult | 1.5–2.5 hours | Medium–High |
Diagnostic fee reality: Many service calls charge a diagnostic fee even if you proceed with repair. Factor this into the repair vs replace decision.
Repair vs Replace Decision Guide
Step 1: Can you fix it for free?
- Power / restart issue → 5-minute reset → fixed.
- Filter clogged → clean → fixed.
- Float stuck → vinegar cleaning → fixed.
- LO code → move to warmer location → fixed.
- If no → go to Step 2.
Step 2: What is the repair quote?
- Capacitor replacement → usually repair.
- Fan motor replacement → evaluate against unit age and 60% threshold.
- Sensor replacement → usually repair on units under about 2 years old.
- Control board replacement → usually replace on units over about 4 years old.
- Compressor replacement → replace after confirming capacitor is good.
Step 3: Is repair less than 60% of a new unit?
- Use the current price of a comparable new unit in your region.
- If repair is below the threshold → repair may be worth it.
- If repair is at or above the threshold → replacement may be more practical.
| Repair Type | Typical Cost Range | Recommendation |
|---|---|---|
| 5-minute reset | $0 | Always try first |
| Filter cleaning | Low | Always repair |
| Float sensor cleaning | Low | Always repair |
| Capacitor replacement | Low–Medium | Usually repair |
| Fan motor replacement | Medium | Evaluate against unit age and 60% threshold |
| Sensor replacement | Medium | Usually repair on units under about 2 years old |
| Control board replacement | Medium–High | Usually replace on units over about 4 years old |
| Compressor replacement | High | Always replace after confirming capacitor is good |
Early Warning Signs Before Major Repair
| Sign | What It Means | Time to Failure |
|---|---|---|
| Grinding from fan | Fan bearing wear | Weeks |
| Buzzing from compressor | Capacitor failing | Weeks to months |
| Beeping on restart | Control lock-up risk | Immediate |
| Water collection declining | Fan or compressor issue | Weeks |
| Unit running longer than usual | Sensor drift | Months |
| Weaker airflow | Filter clog or fan wear | Weeks to months |
| Dust visible on filter | Overheating risk | Immediate |
| Unit feels hot | Ventilation issue | Immediate |
| EC or FO code returning | Control, capacitor, or sensor | Immediate |
Frequently Asked Questions
Should I use this repair guide or the troubleshooting guide?
This repair guide focuses on repair decisions — error codes, costs, DIY vs professional, and when to replace. The troubleshooting guide focuses on diagnosis. Use both together: start with troubleshooting to identify the problem, then come here for repair costs and decisions.
What does the EC code mean on a Frigidaire dehumidifier?
On many Frigidaire models, EC is a general compressor-related error. It can be triggered by a power interruption, sensor fault, full-tank condition, capacitor issue, or compressor start problem. Start with a 5-minute reset. Do not assume EC means the compressor has failed. For the full path, see: Frigidaire Dehumidifier EC Code.
What does the FO code mean on a Frigidaire dehumidifier?
FO is often related to the compressor, fan, or sensor circuit. On many models it overlaps with EC. Start with a 5-minute reset, then check the fan, filter, and float sensor before condemning the compressor. For the full path, see: Frigidaire Dehumidifier FO Code.
What do E1, E2, and E3 mean?
On many Frigidaire models, E1 and E2 are temperature sensor errors. E3 is typically a humidity sensor error. Check your model manual, as code definitions can vary. Sensor replacement is usually a moderate-cost repair.
What does LO mean?
On many Frigidaire models, LO means the ambient temperature is too low for the unit to operate. Move the unit to a warmer location. This is usually a workaround, not a repair.
How much does a Frigidaire dehumidifier repair cost?
Repair prices vary by region, model, and service provider. The most common paid repairs — capacitor and sensor — are generally low to medium cost. Fan motor and control board repairs are medium to higher cost. Compressor replacement is usually not cost-effective. Confirm locally.
How much does Frigidaire fan motor replacement cost?
Fan motor replacement is a medium-cost repair. The exact price depends on model, region, and service provider. As a general guide, if the unit is under about 2 years old and the repair is below the 60% threshold, repair is often worth it.
How much does Frigidaire capacitor replacement cost?
Capacitor replacement is usually a low to medium-cost repair and is often the most cost-effective fix. Confirm locally.
How much does Frigidaire control board replacement cost?
Control board replacement is a medium to high-cost repair. As a general guide, if the unit is more than about 4 years old and the repair approaches 60% of a comparable new unit, replacement is usually the better choice.
Is Frigidaire compressor replacement worth it?
Usually no. Confirm the capacitor is good and the unit is not simply in a lock-up state before condemning the compressor. Replacement is typically the better choice.
Is it worth repairing a Frigidaire dehumidifier?
Use the 60% rule. If repair cost — parts plus labor, including any diagnostic fee — is below 60% of a comparable new unit, repair may be worth it. Capacitor and sensor repairs are usually worth it. Fan motor repairs should be evaluated against unit age. Control board and compressor repairs on older units are usually not worth it.
Can I repair my Frigidaire dehumidifier myself?
You can perform the 5-minute reset, filter cleaning or replacement, float sensor cleaning, and the LO workaround. Fan motor, capacitor, sensor, and control board replacements require professional service. Capacitors can hold a dangerous electrical charge even when unplugged.
Why does my Frigidaire dehumidifier beep and won’t restart?
This is often a control lock-up during reset. The 5-minute reset — unplug for 5 minutes, plug in, press power — resolves many of these cases for free. If that doesn’t work, the control board may have failed.
Why does my Frigidaire dehumidifier run but no water collects?
The most common causes are: fan motor seized — no airflow, no condensation; run capacitor failure — compressor hums but won’t start; humidity sensor drift — unit runs continuously but never reaches setpoint. Check airflow first. For the full diagnostic path, see: Dehumidifier Runs But No Water.
Does this apply to all Frigidaire dehumidifier models?
The core repair patterns are similar across many Frigidaire models, but they are not identical. Error-code meanings, sensor types, and control board behavior can differ by model and generation. Always identify your model before diagnosing.
Final Risk Rating
| User Type | Risk Level | Assessment | Repair Decision Point |
|---|---|---|---|
| Light user (seasonal) | Moderate | Units often last 2.5–3.5 years | Most repairs cost-effective if below 60% threshold |
| Average user (daily, 8–16 hrs) | High | Fan failure dominant | Fan motor repairs worth evaluating; board and compressor usually not |
| Heavy user (24/7 continuous) | Very High | Shorter median lifespan | Replace for most failures; consider commercial-grade unit |
Final Word
Frigidaire dehumidifiers have predictable, often fixable problems. The error code on the display is the fastest path to the right repair decision — EC, FO, E1, E2, E3, and LO each point to a different diagnostic direction.
Start with the free steps:
- 5-minute reset.
- Filter cleaning.
- Float sensor cleaning.
- LO code → move to warmer location.
Then decide on paid repairs:
- Capacitor replacement — usually worth it.
- Sensor replacement — usually worth it on units under about 2 years old.
- Fan motor replacement — evaluate against unit age and 60% threshold.
- Control board replacement — usually replace on units over about 4 years old.
- Compressor replacement — usually replace after confirming capacitor is good.
Frigidaire-specific notes:
- EC and FO are often simple fixes — do not jump to compressor replacement.
- Frigidaire parts availability is moderate. Check before committing to major repairs.
- Many Frigidaire dehumidifiers do not auto-restart after a power outage. Check your model manual.
Prevention: Clean the filter every 3 months. Do not unplug the unit to clear a full-tank error — empty the tank first. In power-unstable areas, consider a surge protector. If you hear grinding from the fan area, replace the fan motor before compressor damage occurs.
Last updated: August 2026
Applies to: Frigidaire residential dehumidifiers
Related guides: Frigidaire Dehumidifier Troubleshooting, Frigidaire Dehumidifier EC Code, Frigidaire Dehumidifier FO Code, Dehumidifier Runs But No Water, Dehumidifier Fan Not Working