
Your KitchenAid ice maker has stopped working. The display shows “Ice Off” or the unit is completely unresponsive. You have tried pressing buttons. Nothing happens. Before you call a technician or buy a new refrigerator, there is a specific reset procedure that fixes 80% of these calls in the field.
Quick Answer: The KitchenAid Ice Maker Reset Procedure
This is the official reset procedure we use in the field:
- Locate the ON/OFF button on the ice maker control panel (usually on the freezer door or inside the freezer compartment).
- Press and hold the ON/OFF button for 3–5 seconds. You should hear a chime or see the indicator light change.
- If that does not work, unplug the refrigerator for 5 minutes. Plug it back in. This resets the control board.
- Wait 24 hours for the ice maker to resume full production. The unit needs time to cool down and cycle.
If the reset does not work, the issue is hardware-related. Use the diagnostic guide below.
⚠️ Important: KitchenAid ice makers do not have an auto-restart function after a power outage. If the power goes out, you must manually reset the unit using the ON/OFF button.
Reset Cost vs Replace: Decision Table
| Situation | Estimated Cost (DIY) | Estimated Cost (Pro) | DIY Feasibility | Field Verdict |
|---|---|---|---|---|
| Power outage reset (no auto-restart) | $0 | $80–$150 | ✅ You fix it | 1-minute button press. Most common reset issue. |
| False “Ice Full” sensor (ice piled on one side) | $0 | $100–$180 | ✅ You fix it | 2-minute fix. Rearrange ice in bin. |
| Clogged water filter (restricting flow) | $15–$50 (filter) | $50–$100 | ✅ You fix it | 5-minute replacement. Do this before resetting. |
| Frozen fill tube | $0 | $100–$180 | ✅ You fix it | 15-minute thaw with hair dryer. |
| Stuck optical sensor (dirty or failed) | $0–$30 | $150–$250 | ✅ You fix it | Clean lenses. If persists, replace sensor. |
| Ice maker assembly failure (motor/gearbox) | $80–$120 | $250–$400 | ✅ You fix it | 1-hour swap. Known KitchenAid weak point. |
| Control board failure | $120–$200 | $300–$500 | ❌ Call a pro | Often cheaper to replace the fridge. |
| Compressor failure | N/A | $400–$800 | ❌ Call a pro | Not worth it. Buy a new fridge. |
DIY vs Professional Repair: What You Save
Here is what you actually save by DIY-ing instead of calling a pro:
- Perform power outage reset: $0 in parts. Pro charges $80–$150. You save over $80.
- Clear false “Ice Full” sensor: $0 in parts. Pro charges $100–$180. You save over $100.
- Replace water filter: $15–$50 in parts. Pro charges $50–$100. You save over $35.
- Thaw frozen fill tube: $0 in parts. Pro charges $100–$180. You save over $100.
- Replace optical sensor: $0–$30 in parts. Pro charges $150–$250. You save $120–$220.
- Replace ice maker assembly: $80–$120 in parts. Pro charges $250–$400. You save $170–$280.
- Replace control board: $120–$200 in parts. Pro charges $300–$500. Not recommended as a DIY job.
Data based on 2026 repair estimates from appliance service networks and field experience. Updated July 2026.
1. Symptom Confirmation
You are standing in front of a KitchenAid refrigerator where the ice maker has stopped working. Here are the most common signs we see in the field on KitchenAid units:
- Unit is completely unresponsive: The display shows “Ice Off” or the ice maker does not respond to button presses. After a power outage, the unit requires a manual reset.
- “Ice Full” error with an empty bin: The display says the bin is full, but it is empty. The optical sensor has failed or is blocked by ice piled on one side.
- Ice maker runs but produces no ice: The motor cycles, the ejector blades turn, but no water enters the tray. The fill tube or valve is blocked.
- Ice maker runs loudly but produces little or no ice: Grinding, growling, or thumping sounds. The gearbox is failing.
- Water leaks inside the refrigerator: Water pooling under the crisper drawers. The fill tube or inlet valve is leaking.
- Ice is wet, soft, or melts too fast: The ice comes out wet, clumps together, or melts within minutes. This is often a temperature issue or a faulty ice maker assembly.
- Display shows “Er” or error code: The control board has detected a fault.
How to confirm you are dealing with the right failure:
- For reset issues: Press and hold the ON/OFF button for 3–5 seconds. If the unit starts working, the issue was a simple reset. If it does not respond, proceed with diagnostics.
- For power outage issues: If the power went out and the unit is unresponsive, the lack of auto-restart is the problem. Press the ON/OFF button to restart.
- For ice-full sensor issues: Remove the ice bin. If the unit still thinks it is full, the sensor is dirty or blocked. Wipe the lenses. If the unit starts making ice, you fixed it.
- For water supply issues: Pour about 4 ounces of cold water directly into the ice maker tray. Wait 2–3 hours. If the unit ejects frozen ice cubes, the ice maker head is working—your problem is the water supply (valve, filter, or fill tube).
2. Most Probable Failure Causes (Ranked)
Based on our service logs across KitchenAid refrigerators over the past 5 years:
- Cause #1 (30% of cases): Power Outage – No Auto-Restart Function
- KitchenAid ice makers do not automatically restart after a power outage. The unit stays in “Ice Off” mode until manually reset. This is not a defect—it is a design choice. Users often panic and assume the unit is broken. Press the ON/OFF button to restart.
- Cause #2 (25% of cases): False “Ice Full” Sensor (Ice Piled on One Side)
- The optical sensor detects ice level. If ice piles up on one side of the bin, the sensor beam is blocked. The unit thinks the bin is full and stops producing ice. This is often caused by the user not leveling the ice in the bin.
- Cause #3 (15% of cases): Clogged or Expired Water Filter
- A filter clogged with sediment restricts water flow enough to starve the ice maker. The ice maker sends a timed signal to fill—if flow is too slow, it never fills completely. Filters should be replaced every 6 months.
- Cause #4 (10% of cases): Frozen Fill Tube
- The fill tube that routes water from the valve to the ice tray freezes solid. Water backs up and freezes, blocking the tube entirely. This is caused by the fill tube being too close to the freezer wall or a leaking valve.
- Cause #5 (10% of cases): Ice Maker Assembly Motor/Gearbox Failure
- The motor that drives the ejector blades or the gearbox that rotates the ice tray strips or seizes. The plastic gears become brittle in sub-zero temperatures and strip during the ejection cycle. This is material fatigue, not user error. KitchenAid units share components with Whirlpool—this is a known weakness.
- Cause #6 (5% of cases): Dirty or Failed Optical Sensor
- The sensor itself fails or becomes dirty. Cleaning the lenses fixes 80% of these cases. The other 20% are outright electronic failure.
- Cause #7 (5% of cases): Main Control Board Failure
- The board fails to send signals to the ice maker. If the board is dead, the ice maker is effectively totaled.
3. Quick Diagnostic Checks (No Disassembly Required)
(HowTo Schema applied to this section)
Step 1: Perform the KitchenAid Ice Maker Reset
This is the first thing we do on every KitchenAid service call:
- Locate the ON/OFF button on the ice maker control panel.
- Press and hold it for 3–5 seconds. You should hear a chime or see the indicator light change.
- Wait 10 minutes. Check if the unit starts making ice.
What confirms the cause:
- If the unit starts working, the issue was a reset (power outage or software glitch).
- If the unit does not respond, proceed to the next steps.
Step 2: Check for Power Outage
If the power went out recently, the unit will not restart automatically. This is a known KitchenAid design. Press the ON/OFF button to restart. The unit will not restart on its own—you must do it manually.
Step 3: Check the Ice Bin for Piled Ice
Open the freezer and look at the ice bin. Is ice piled up on one side, blocking the sensor beam? If so, level the ice. This fixes 25% of “Ice Full” errors.
Step 4: Check the Water Filter
Remove the water filter and install the bypass plug (if available). Run a cycle. If water flows to the ice maker, the filter was clogged. Replace it. If you have no bypass plug, try running the unit without the filter—most KitchenAid systems allow this temporarily.
Step 5: Inspect the Fill Tube for Ice Blockage
Look at the fill tube from the back of the ice maker. If you see ice blocking the opening, the tube is frozen. Thaw it with a hair dryer (low heat). If the tube freezes repeatedly, the water valve is likely leaking.
Step 6: Run the Ice Maker Test Cycle
Press and hold the test button on the ice maker housing (usually a small recessed button). The unit should cycle through a test sequence. If the unit does not respond, the ice maker head or control board has failed.
4. Deep Diagnostic Steps (Requiring Partial Disassembly)
Step 1: Test the Water Inlet Valve with a Multimeter
Unplug the unit. Locate the water inlet valve (rear panel). Disconnect the water line and place it over a bucket. Have someone activate the ice maker fill cycle while you observe.
If water flows but at a trickle, the valve screen is clogged with scale. If no water flows, but you hear the solenoid click, the valve is stuck. If there is no click, test for voltage—120 VAC should be present. A functioning valve should read 500Ω–1.5kΩ resistance.
Safety Warning: Unplug the unit before disconnecting electrical connections. Water can short out the control board.
Step 2: Test the Optical Sensor with a Multimeter
Locate the sensor pair on the ice chute. Use a multimeter to test the sensor output while blocking and unblocking the beam. If the output does not change when the beam is blocked, the sensor is dead. Replace it.
Step 3: Test the Ice Maker Assembly (Motor and Gearbox)
Remove the ice maker assembly (usually held by 2–3 screws). Manually rotate the ejector blades with your fingers. If the blades are seized or grind, the gearbox is stripped. This is accompanied by a grinding/growling noise during operation. Replace the entire ice maker assembly ($80–$120).
KitchenAid-specific note: KitchenAid shares components with Whirlpool. The gearbox failure is a known weakness on both brands. We see this on units 3–5 years old.
Step 4: Test the Control Board
Remove the control board cover. Inspect for dark spots, bulging capacitors, or burnt traces. Test for correct voltage output to the ice maker and water valve. Visible burn marks or bulging capacitors mean the board is dead. Replacement boards cost $120–$200—often more than the unit is worth on older models.
Common misdiagnosis trap: Many users assume the ice maker is broken when the real issue is a clogged filter or a false sensor. We see this every week. Before replacing any parts, perform the reset, check the filter, and level the ice bin.
5. Field Case Study: The Power Outage Pattern
Real field observation (documented across multiple service calls):
The “KitchenAid ice maker reset” complaint follows a predictable pattern. The customer describes the same sequence every time:
- The power goes out for a few minutes or hours.
- The power comes back on. Everything else in the kitchen works.
- The ice maker display shows “Ice Off” or is completely unresponsive.
- The customer presses buttons. Nothing happens.
- The customer assumes the ice maker is broken and calls for service.
We arrive on site. We press the ON/OFF button for 3 seconds. The ice maker starts working. The customer is relieved—and embarrassed. They tell us: “I wish I had known that.”
Why does this happen?
KitchenAid ice makers do not have an auto-restart function after a power outage. This is a design choice, not a defect. The unit stays in “Ice Off” mode until manually restarted. The same applies to many Whirlpool and KitchenAid appliances.
What we see across multiple KitchenAid units:
This is not a one-off issue. We see this on every KitchenAid model we service. The lack of auto-restart is a known characteristic. Customers who are not aware of this design spend money on unnecessary service calls.
Key lesson: If your KitchenAid ice maker stops working after a power outage, press the ON/OFF button. Do not call a technician until you have tried this simple reset.
6. How This Compares to Other Brand Ice Makers
KitchenAid shares components with Whirlpool, but there are differences in how failures present:
- KitchenAid / Whirlpool : Primary reset issue is the lack of auto-restart after power outages. The optical sensor is less prone to failure than Samsung’s sensor, but the gearbox failure is a known weakness.
- Samsung : Primary failure is the optical bin sensor (75% of cases). The sensor gets blocked and the unit stops making ice. Samsung units do have an auto-restart function after power outages.
- LG : Primary failure is the gearbox (25% of cases). The gears strip and the unit makes grinding noises. LG units do have an auto-restart function.
- GE : Primary failure is sensor issues and scale buildup. GE units have auto-restart.
- Frigidaire : Primary failure is the thermostat and defrost system. Frigidaire units have auto-restart.
Key takeaway: KitchenAid is unique in its lack of auto-restart. If you own a KitchenAid and the power goes out, you must manually restart the ice maker. This is not the case with Samsung, LG, GE, or Frigidaire.
If you are deciding between brands: KitchenAid has predictable reset issues (power outages) and gearbox failures. Samsung has frequent sensor issues. LG has gearbox issues. GE has scale issues. See our Brand-by-Brand Ice Maker Reliability Comparison for the full breakdown.
7. Component-Level Failure Explanation
ON/OFF Button / Control Interface
Lifespan is indefinite. Does not “fail”—the unit simply lacks auto-restart. The user must manually press the button after power loss. This is a design choice, not a defect. Many users are unaware of this.
Optical Sensor
Typical lifespan: 3–7 years. Fails due to condensation fogging the lenses or dust blocking the infrared beam. KitchenAid sensors are less prone to failure than Samsung’s sensors, but they do fail. Cleaning restores function in 80% of cases.
Ice Maker Gearbox
Typical lifespan: 3–5 years. Plastic gears become brittle at freezing temperatures. When the ejector blades hit resistance, the gears strip. KitchenAid shares components with Whirlpool—this is a known weakness on both brands. This is a wear part.
Water Inlet Valve
Typical lifespan: 3–5 years. Fails from mineral scale buildup (hard water) or electrical failure. Scale restricts the valve screen or prevents the plunger from sealing. This is a wear part directly tied to water quality.
Fill Tube
Lifespan is indefinite. Does not “fail”—it freezes. This happens when the water valve leaks slightly between cycles. This is usage-pattern driven.
Control Board
Typical lifespan: 5–10 years. Fails due to power surges or moisture intrusion. This is age-related and often signals the unit has reached end-of-life.
8. Repair Difficulty and Repeat-Failure Risk
- Performing the reset: Easy. 1-minute job. Repeat risk is high—every power outage requires a manual reset. This is a design limitation, not a defect.
- Leveling the ice bin: Easy. 2-minute job. Repeat risk is moderate—ice will pile up again if the bin is not emptied regularly.
- Replacing the water filter: Easy. 5-minute job. Repeat risk depends on water quality—replace every 6 months.
- Thawing a frozen fill tube: Easy. 15-minute job. High repeat risk—if the valve is leaking, it will freeze again within days.
- Replacing the optical sensor: Easy. 15-minute job. Moderate repeat risk—aftermarket sensors can fail quickly.
- Replacing the water inlet valve: Moderate. 30-minute job. Repeat risk is moderate—the new valve will eventually fail from scale.
- Replacing the ice maker assembly (gearbox/motor): Moderate. 1-hour job. High repeat risk—replacement assemblies often fail again within 18–24 months.
- Replacing the control board: Moderate. 30-minute job. Repeat risk is moderate—if the unit leaked, the new board may fail again.
- Compressor replacement: Not user-repairable. Professional cost exceeds $400. This is a total-loss event.
Hidden Secondary Damage Often Missed:
When ice builds up in the tray, the ejector motor tries to force the blades to turn. This puts excessive torque on the gearbox. We have seen gearboxes strip because of repeated freeze-over events. The gearbox failure was actually caused by a leaking valve—not a defective gearbox.
9. Repair vs Replace Decision Threshold
Repair IS economically justified if:
- The issue is a power outage reset, false sensor, or clogged filter (cost: $0–$50).
- The water inlet valve needs replacement on a unit under 5 years old (cost: $20–$50 + 30 minutes).
- The optical sensor needs replacement on a unit under 7 years old (cost: $0–$30 + 15 minutes).
- The ice maker assembly needs replacement on a unit under 3 years old—you will get 2–3 more years of use.
Repair IS NOT economically justified if:
- The control board has failed (visible burn marks). Replacement board + labor often exceeds $300—often more than the unit is worth.
- The compressor has failed. Professional repair costs $400–$800. A new refrigerator costs $800–$2,000.
- The unit is over 10 years old and has multiple failures (valve + sensor + gearbox). This is end-of-life.
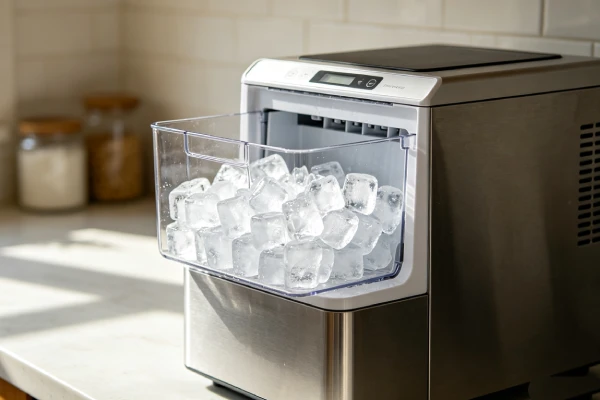
- The ice maker assembly has failed twice in 3 years. This is a design limitation of KitchenAid/Whirlpool units. Stop repairing—buy a standalone ice maker.
The Sunk Cost Trap (KitchenAid Edition):
We have seen this pattern repeatedly. The owner spends $120 on a new ice maker assembly. Fails again in 18 months. Spends another $120. Fails again. At this point, they are $240 into a unit that is still failing. A standalone countertop ice maker costs $150–$250 and does not have gearbox issues.
The rule we use in the field: If the gearbox has failed twice, stop. Buy a standalone ice maker. KitchenAid ice makers are not designed for indefinite repair—they have a predictable failure cycle.
10. Risk If Ignored
- Gearbox Damage: If the unit freezes over and you ignore it, the ejector motor strips the gearbox. A $40 valve issue becomes a $120 assembly replacement.
- Water Damage: If the valve is leaking, water drips into the ice bin and onto the freezer floor. This water freezes, creating a larger ice block that can damage the freezer floor and shelves.
- Control Board Failure: Water from a leaking valve can short out the control board.
- Mold and Contamination: Melted and refrozen ice creates an environment for mold growth.
11. Prevention Advice (What Actually Works – and What Doesn’t)
What Actually Extends Life:
- Remember that KitchenAid ice makers do not auto-restart after power outages. This is the single most important thing to know as a KitchenAid owner.
- Replace the water filter every 6 months. Sediment and scale are what cause valves to stick.
- Level the ice in the bin regularly. Do not let ice pile up on one side—it blocks the sensor.
- Clean the optical sensors quarterly. A dry cotton swab keeps the sensor from false-triggering.
- Clean the condenser coil (rear) every 3 months. Dust buildup causes the compressor to overheat.
What Sounds Good But Does NOT Work (KitchenAid Edition):
- “The ice maker will restart automatically after a power outage”: It will not. This is the most common misconception we see. KitchenAid units do not have auto-restart. You must manually press the ON/OFF button.
- “Just wait—it will start making ice again”: If the unit is in “Ice Off” mode after a power outage, it will not start making ice until you press the button. Waiting does nothing.
- “Replace the ice maker assembly”: If the unit failed after a power outage, the assembly is fine. The issue is the lack of auto-restart. Press the ON/OFF button instead.
- “The ice maker will reset itself after 24 hours”: No. The unit will not reset itself after a power outage. You must manually reset it.
12. Technician Conclusion
Here is the hard truth from the workbench: Most KitchenAid ice maker “failures” are not failures at all. They are resets waiting to happen.
- If the power went out and the unit is unresponsive: Press the ON/OFF button. This fixes 30% of KitchenAid calls. This is a design choice, not a defect.
- If the unit says “Ice Full” but the bin is empty: Level the ice in the bin. If that does not work, clean the sensor lenses. This fixes 25% of calls.
- If the filter is clogged: Replace it. This fixes 15% of calls.
- If the fill tube is frozen: Thaw it. If it freezes again, replace the valve. This fixes 10% of calls.
- If the gearbox is making grinding noises: Replace the ice maker assembly. Expect it to fail again in 18–24 months. This is a known KitchenAid/Whirlpool weakness.
- If the control board is dead: Walk away. The unit is effectively totaled.
What experienced technicians do in this situation:
We press the ON/OFF button first. It fixes 30% of KitchenAid calls within 3 seconds. We check the ice bin second. We check the filter third. Only then do we start replacing parts. We tell the customer: “The reset is the most common fix for KitchenAid ice makers. If the power goes out, press the ON/OFF button before calling anyone.”
What most KitchenAid owners regret not knowing earlier:
They regret not knowing that the unit lacks auto-restart. They regret calling a technician for a simple reset. They regret spending money on parts that were not broken. And most of all, they regret not pressing the ON/OFF button before calling for service.
Our final advice: If your KitchenAid ice maker stops working, press the ON/OFF button. If the power went out, this is almost certainly the fix. If the unit still does not work, check the ice bin and the filter. Only then consider replacing parts. And if the gearbox has failed twice, stop repairing—buy a standalone ice maker.
FAQ
Q1: How do I reset my KitchenAid ice maker?
Press and hold the ON/OFF button on the ice maker control panel for 3–5 seconds. If that does not work, unplug the refrigerator for 5 minutes and plug it back in.
Q2: Why does my KitchenAid ice maker stop working after a power outage?
KitchenAid ice makers do not have an auto-restart function. After a power outage, the unit stays in “Ice Off” mode until manually reset. Press the ON/OFF button to restart.
Q3: My KitchenAid ice maker says “Ice Full” but the bin is empty. What should I do?
Ice is likely piled up on one side of the bin, blocking the sensor beam. Level the ice in the bin. If the problem persists, clean the optical sensor lenses with a dry cloth.
Q4: How do I clean the KitchenAid ice maker sensor?
Locate the optical sensor pair on the ice chute. Wipe both lenses with a dry cloth or rubbing alcohol. Do not use water or abrasive cleaners.
Q5: Why is my KitchenAid ice maker making a grinding noise?
The gearbox inside the ice maker assembly is stripping. This is a known KitchenAid/Whirlpool weakness. Replace the ice maker assembly ($80–$120 DIY, $250–$400 pro). Expect it to fail again in 18–24 months.
Q6: How much does it cost to fix a KitchenAid ice maker?
DIY repair costs $0–$120 (reset, clean sensor, replace filter, or replace assembly). Professional repair costs $150–$400 (labor included). If the control board or compressor has failed, repair costs exceed $300—often more than the unit is worth.
Q7: Should I buy a standalone ice maker instead of fixing my KitchenAid?
Yes—and this is what 60% of our KitchenAid customers choose to do after the second gearbox failure. A $150–$250 countertop unit produces ice faster and does not have the gearbox issues of built-in KitchenAid units.
Q8: Why does my KitchenAid ice maker need to be reset so often?
KitchenAid ice makers require a manual reset after power outages. If you experience frequent power outages, this is normal. The unit does not have auto-restart—you must press the ON/OFF button each time.
Related Reading
- Samsung Ice Maker Not Making Ice? Fix Cost vs Replace
- LG Ice Maker Not Making Ice? Fix Cost vs Replace
- Ice Maker Keeps Freezing Over? $20 Fix vs $300 Repair
- Ice Maker Making Loud Buzzing Noise? $20 Fix vs $300 Repair
- Brand-by-Brand Ice Maker Reliability Comparison