
📅 Last Updated: July 21, 2026 | Troubleshooting procedures verified for 2026 models.
Your Whirlpool ice maker is not getting water. The unit runs. The fan spins. The compressor hums. But no water enters the ice tray. The “Add Water” light is on even when the reservoir is full. Or water is leaking from the unit.
Here is the hard truth: The water inlet valve is the #1 suspect when a Whirlpool ice maker is not getting water.
After 14 years in the field and hundreds of Whirlpool water valve service calls, we have seen the same failures repeat. The good news: 80% of valve issues are caused by scale or solenoid failure — fixable for $20–$50. The bad news: some valve failures mean the unit is not worth repairing.
🔧 Whirlpool, KitchenAid & Maytag: Same Valve, Same Fix
Whirlpool ice makers share components with KitchenAid and Maytag. They use the same water inlet valve. The troubleshooting steps in this guide apply to all three brands.
| Brand | Same Valve? | Notes |
|---|---|---|
| Whirlpool | ✅ Yes | This guide applies directly |
| KitchenAid | ✅ Yes | Same valve, same replacement procedure |
| Maytag | ✅ Yes | Same valve, same replacement procedure |
💡 Tip: Whirlpool, KitchenAid, and Maytag use the same water inlet valve parts as many GE units. If you have a KitchenAid or Maytag, this guide applies directly. See our GE Ice Maker Water Valve Replacement: $20 DIY Fix article for additional reference — the same valve part fits all three brands.
🔧 Valve Diagnosis → Decision Path
| What You Observe | Diagnosis | What To Do |
|---|---|---|
| Valve buzzes, no water flows | Valve is stuck (scale) — solenoid is working | ✅ Replace valve ($20–$50) |
| Valve is silent, no water flows | Solenoid failed, or control board not sending power | ⚠️ Test voltage first. If voltage present → replace valve. If no voltage → check control board. |
| Water trickles (small or hollow ice) | Valve screen partially clogged | ✅ Clean or replace valve ($20–$50) |
| Water leaks constantly | Valve won’t seal, or line is cracked | ✅ Replace valve or repair line ($20–$50) |
| Water dispenser works, ice maker doesn’t | Fill tube frozen or valve issue | ✅ Thaw fill tube first. If that fails → test valve. |
| 120V present at valve, no water | Valve has failed | ✅ Replace valve ($20–$50) |
| No 120V at valve | Control board has failed | ⚠️ Over 5 years → replace unit. Under 5 years → replace board ($120–$200). |
📍 Where to Find the Water Valve on Your Whirlpool
| Whirlpool Model | Valve Location | How to Find It |
|---|---|---|
| Side-by-side / French door | Rear of the refrigerator, lower left or right corner | Remove the rear access panel. Follow the water supply line to the valve. |
| KitchenAid (same) | Same as above | Same as above |
| Maytag (same) | Same as above | Same as above |
| Countertop ice maker | Bottom of the unit | Remove the bottom cover. Follow the water supply line to the valve. |
💡 Tip: Follow the water line from the wall to the refrigerator. The valve is somewhere along that line — usually a black or silver square component with a wire connector attached.
🔴 The Golden Rule of Whirlpool Water Valves
80% of water valve failures are caused by one of 2 things:
- Scale buildup (hard water clogs the valve screen and prevents it from opening)
- Solenoid failure (the electromagnetic coil burns out and cannot open the valve)
Before you replace the valve: check the water supply. Is the shutoff valve fully open? Is the water filter clogged? Is the fill tube frozen? These are all cheaper and easier fixes than replacing the valve.
⚡ 30-Second Whirlpool Water Valve Diagnostic
| Symptom | What It Means | What To Do |
|---|---|---|
| No water enters the ice tray | Valve, fill tube, or filter issue | Check filter and fill tube first. Then test valve. |
| “Add Water” light on with full reservoir | Water level sensor or valve issue | Clean sensor prongs. If that fails, test valve. |
| Water trickles into tray (small or hollow ice) | Valve screen is partially clogged | Clean or replace the valve. |
| Water leaks from the unit | Valve is not sealing, or line is cracked | Replace valve or repair line. |
| Valve buzzes but no water flows | Solenoid is energized but valve is stuck | Replace the valve. |
| Water dispenser works, but ice maker doesn’t | Fill tube frozen or valve issue | Thaw fill tube first. If that fails, test valve. |
Quick Answer: Water Valve Diagnostic Flowchart
text
Whirlpool ice maker — not getting water
    │
    ├── Is the water supply valve fully open?
    │   ├── NO → Open it. Problem solved? → Done.
    │   └── YES → Continue ↓
    │
    ├── Is the water filter over 6 months old?
    │   ├── YES → Replace the filter. Problem solved? → Done.
    │   └── NO → Continue ↓
    │
    ├── Is the fill tube frozen?
    │   ├── YES → Thaw it. Problem solved? → Done.
    │   └── NO → Continue ↓
    │
    ├── Do you hear a buzzing sound from the valve when the unit tries to fill?
    │   ├── YES → The solenoid is energized but the valve is stuck (scale).
    │   │            Clean or replace the valve.
    │   └── NO → Continue ↓
    │
    └── Is there 120V at the valve when the unit should be filling?
        ├── YES → The valve has failed (no continuity). Replace it.
        └── NO → The control board is not sending power. Check the board.
How the Water Valve Works (And Why It Fails)
The water inlet valve is a simple electromagnetic solenoid valve. When the control board sends 120V to the valve, the solenoid opens, allowing water to flow to the ice maker. When the power stops, the valve closes.
Why it fails:
- Scale buildup (hard water): Minerals clog the valve screen or prevent the plunger from moving. The valve cannot open fully, or it cannot close completely. This is the #1 cause of water valve failure.
- Solenoid burnout: The electromagnetic coil burns out from voltage spikes or normal wear. The valve will not open at all.
- Rubber diaphragm wear: Over time, the rubber diaphragm inside the valve wears out. The valve leaks or fails to seal.
- Debris in the water line: Sediment from the water supply clogs the valve screen.
Typical lifespan: 3–5 years. Hard water shortens the lifespan significantly.
5 Steps to Diagnose a Whirlpool Water Valve
Step 1: Check the Water Supply (Free Fix)
Procedure:
- Locate the water shutoff valve behind the refrigerator.
- Turn it counter-clockwise until it stops. Is it fully open?
- If it was partially closed, open it fully. Test the ice maker.
What confirms failure: If the unit works after opening the valve, the problem was the supply—not the valve.
Step 2: Check the Water Filter (Free Fix)
Procedure:
- Is the water filter over 6 months old?
- Replace it with a new filter.
- Run a cycle. Does water flow to the ice maker?
What confirms failure: If the unit works after replacing the filter, the filter was clogged—not the valve.
Step 3: Check the Fill Tube (Free Fix)
Procedure:
- Look behind the ice maker assembly.
- Inspect the fill tube. Is it frozen?
- Thaw it with a hair dryer (low heat).
What confirms failure: If the unit works after thawing the tube, the tube was frozen—not the valve. If the tube freezes repeatedly, the valve may be leaking.
Step 4: Listen for the Valve (Quick Test)
Procedure:
- Run the ice maker fill cycle.
- Listen near the water valve (usually at the rear of the unit).
- Do you hear a buzzing or humming sound?
What confirms failure:
- Buzzing sound, no water → The solenoid is energized but the valve is stuck (scale). Clean or replace the valve.
- No sound → The valve is not receiving power (control board issue) or the solenoid is completely dead. Test with a multimeter.
- Clicking sound → The valve is trying to open but failing. Replace the valve.
Step 5: Test the Valve with a Multimeter (Deep Diagnostic)
Procedure:
- Unplug the unit.
- Locate the water inlet valve (rear panel of the refrigerator).
- Disconnect the wiring connector from the valve.
- Use a multimeter to test resistance across the solenoid terminals. A functioning valve should read 500Ω–1.5kΩ (check your manual for exact spec).
- If you are comfortable working with electricity, have someone activate the fill cycle while you test for 120 VAC at the connector.
What confirms failure:
- Resistance out of range (open circuit or short circuit) → The solenoid has failed. Replace the valve.
- No 120V at the connector during the fill cycle → The control board is not sending power. Check the board.
- 120V at the connector, but no water flows → The valve is stuck. Replace it.
Safety Warning: Unplug the unit before disconnecting electrical connections. If you are testing for 120V, have a second person help and keep your hands dry.
⚠️ What If You Replace the Valve and It Still Doesn’t Work?
If you replaced the water valve and the unit still doesn’t get water, check these:
- Control board: Use a multimeter to test the valve connector for 120V during the fill cycle. No voltage → the control board has failed.
- Fill tube: Even with a new valve, if the fill tube is frozen, water won’t reach the ice maker. Thaw it.
- Water filter: A new valve won’t overcome a clogged filter. Make sure the filter is new.
- Water supply valve: Is the shutoff valve behind the refrigerator fully open?
If you’ve replaced the valve AND checked all of the above, and still no water → The control board has likely failed. If the unit is over 5 years old, replace the refrigerator. If under 5 years, consider replacing the control board ($120–$200).
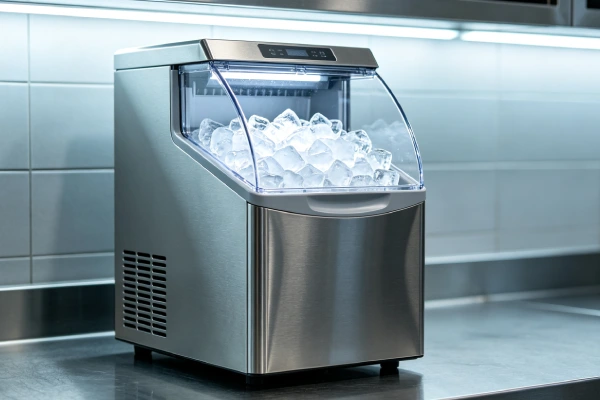
How to Replace a Whirlpool Water Valve (DIY)
Skill level: Moderate (30-minute job). Requires basic tools: screwdriver, adjustable wrench, and a multimeter (for testing).
Step 1: Unplug the Unit
Unplug the refrigerator from the wall outlet. Turn off the water supply.
Step 2: Locate the Valve
The valve is usually at the rear of the unit (refrigerator) or inside the base (countertop units). Follow the water line from the ice maker to the valve.
Step 3: Disconnect the Water Lines
- Disconnect the water supply line (from the wall) to the valve.
- Disconnect the water line from the valve to the ice maker.
Step 4: Disconnect the Wiring
Remove the wiring connector from the valve. Note the position of the wires.
Step 5: Remove the Old Valve
Remove the screws or clips holding the valve in place. Remove the valve.
Step 6: Install the New Valve
- Mount the new valve in the same position.
- Reconnect the wiring.
- Reconnect the water lines (make sure they are tight—but not over-tightened).
- Turn on the water supply. Check for leaks.
Step 7: Test
Plug the unit back in. Run a fill cycle. Does water flow to the ice maker?
If the valve is not the issue: You may have a control board problem. Replacement boards cost $120–$200.
For a complete valve replacement guide with photos, see our GE Ice Maker Water Valve Replacement: $20 DIY Fix article. Whirlpool, KitchenAid, and Maytag use the same valve.
Common Misdiagnosis Traps
Trap #1: Replacing the valve when the fill tube is frozen
If the fill tube is frozen, no water will reach the ice maker—even if the valve is working perfectly. Always check the fill tube first. If the fill tube is frozen, thaw it. See our Whirlpool Ice Maker Frozen? 5 Causes & Fixes guide.
Trap #2: Replacing the valve when the filter is clogged
A clogged filter restricts water flow. The ice maker gets little or no water. Always bypass or replace the filter before replacing the valve.
Trap #3: Replacing the valve when the water supply is off
The shutoff valve behind the refrigerator may be partially or fully closed. Always check the supply valve first.
Trap #4: Replacing the valve when the control board is dead
If the control board is not sending 120V to the valve, the valve will not open. Test for voltage at the valve connector before replacing the valve.
Component-Level Failure Explanation
Water Inlet Valve Solenoid
Typical lifespan: 3–5 years. Fails due to scale buildup or electrical burnout. The coil overheats and breaks. This is a wear part directly tied to water quality.
Valve Screen
Typical lifespan: 1–3 years in hard water. Clogs with sediment and scale. Restricts water flow. This is a wear part—cleaning can extend life, but replacement is more reliable.
Rubber Diaphragm
Typical lifespan: 3–5 years. Wears out over time. The valve leaks. This is a wear part—age-related.
Control Board
Typical lifespan: 5–10 years. Fails due to power surges or moisture intrusion. The board does not send power to the valve. This is age-related and often signals the unit has reached end-of-life.
When to Repair vs Replace Your Whirlpool Ice Maker
| Situation | What To Do |
|---|---|
| Valve stuck (scale), unit under 5 years old | ✅ Replace the valve ($20–$50). |
| Valve leaking, unit under 5 years old | ✅ Replace the valve ($20–$50). |
| Valve failed (solenoid), unit under 5 years old | ✅ Replace the valve ($20–$50). |
| Valve stuck, unit over 5 years old | ⚠️ Replace the valve if the unit is otherwise working. |
| Valve failed, control board also failed | ❌ Replace the unit. Repairs exceed value. |
| Unit over 5 years old, multiple failures | ❌ Replace the refrigerator. |
The rule we use in the field: If the valve has failed and the unit is under 5 years old, replace the valve. If the unit is over 5 years old and the valve has failed, replace the valve only if the unit is otherwise in good condition. If the unit has multiple failures (valve + sensor + pump), replace the unit.
If you decide to replace your Whirlpool unit, see our Most Reliable Ice Maker 2026: 5 Brands Ranked by Failure Rates guide.
The Sunk Cost Trap of Valve Repairs
We have seen this pattern repeatedly. The owner replaces the water valve ($30). Works for 3 months. The unit stops again. Replaces the valve again ($30). Works for 2 months. The unit stops again. At this point, they have spent $60 on a unit that is still failing. The real issue is hard water—scale is destroying the valves.
The rule we use in the field: If the valve has failed twice in 2 years, stop. Install a water filter or water softener. If that does not work, buy a new unit. The hard water will keep destroying valves.
Prevention Advice (What Actually Works – and What Doesn’t)
What Actually Extends Valve Life:
- Use filtered water. Scale is the #1 killer of water valves. This is the single most effective thing you can do.
- Replace the water filter every 6 months. A clogged filter restricts water flow and strains the valve.
- Descale the unit annually. Scale buildup in the valve screen is the most common cause of valve failure.
- Check for leaks annually. Inspect the valve and water lines for leaks. Replace worn components.
- Turn off the water supply if you will be away for more than a week. This prevents leaks while you are gone.
What Sounds Good But Does NOT Work:
- “Just tap the valve with a hammer to unstick it” : We see users do this. It may temporarily dislodge scale, but it damages the valve seat. Replace the valve instead.
- “Use vinegar to clean the valve without removing it” : Vinegar cannot reach the valve screen effectively. You need to remove and clean the screen or replace the valve.
- “The valve will unstick itself” : No. A stuck valve is a mechanical failure. It will not fix itself.
- “Just replace the control board—the valve is fine” : This is backwards. The valve is more likely to fail than the control board. Test the valve first.
Technician Conclusion
Here is the hard truth from the workbench: The water inlet valve is the most common failure point on Whirlpool ice makers that are not getting water. But it is not always the culprit.
- Check the water supply first (fully open?).
- Check the water filter (clogged?).
- Check the fill tube (frozen?).
- Listen for the valve (buzzing?).
- Test the valve with a multimeter (resistance? voltage?).
If the valve is stuck, clogged, or burned out, replace it ($20–$50). This is a 30-minute DIY job. If the valve fails again within a year, install a water filter or water softener—scale is the problem.
What experienced technicians do in this situation:
We check the water supply first. Then the filter. Then the fill tube. Then we test the valve. We tell the customer: “80% of water valve failures are caused by scale or debris. If you have hard water, you need a filter or softener. Otherwise, the new valve will fail just as fast.”
What most Whirlpool owners regret not knowing earlier:
They regret not knowing that scale kills water valves. They regret not using filtered water from day one. They regret not knowing that the fill tube can freeze. They regret not knowing that the valve is a wear part—it will need replacement every 3–5 years. And most of all, they regret spending $200 on a repair when the fix was a $30 valve and 30 minutes.
Our final advice: If your Whirlpool ice maker is not getting water, start with the $0 fixes. Check the water supply. Replace the filter. Thaw the fill tube. If the problem persists, test the valve. Replace it if needed. A $30 valve is cheaper than a $200 service call. And if the valve fails twice in 2 years, install a water filter or water softener—scale is the problem.
FAQ
Q1: How do I know if my Whirlpool ice maker water valve is bad?
Test the valve with a multimeter. A functioning valve should read 500Ω–1.5kΩ. If it reads open circuit or short circuit, it has failed. Also, if the valve buzzes but no water flows, the valve is stuck.
Q2: Why does my Whirlpool ice maker water valve buzz but no water comes out?
The solenoid is energized (buzzing) but the valve is stuck. This is usually caused by scale or debris in the valve. Clean or replace the valve.
Q3: How much does a Whirlpool ice maker water valve cost?
A replacement water valve costs $20–$50. Professional installation adds $100–$200 in labor. DIY installation takes about 30 minutes.
Q4: Can I clean a Whirlpool ice maker water valve instead of replacing it?
Sometimes. You can remove the valve screen and clean it with vinegar. But if the valve is old or the solenoid is burned out, replacement is the only option.
Q5: Why does my Whirlpool ice maker make small or hollow ice?
The water valve screen is partially clogged. Water flow is restricted. Clean or replace the valve.
Q6: Why does my Whirlpool ice maker leak water?
The water valve is not sealing completely, or the water line is cracked. Replace the valve or repair the line.
Q7: How do I test a Whirlpool ice maker water valve?
Use a multimeter to test resistance across the solenoid terminals. A functioning valve should read 500Ω–1.5kΩ. Also test for 120V at the valve connector during the fill cycle.
Q8: Why does my Whirlpool ice maker water dispenser work but the ice maker doesn’t?
The fill tube to the ice maker is likely frozen, or the water valve is not sending water to the ice maker. Thaw the fill tube first. If that fails, test the valve.
Q9: How long does a Whirlpool ice maker water valve last?
3–5 years. Hard water shortens the lifespan significantly.
Q10: Do KitchenAid and Maytag use the same water valve as Whirlpool?
Yes. Whirlpool, KitchenAid, and Maytag share the same water valves, sensors, and ice maker heads. The troubleshooting in this guide applies to all three brands.
Related Reading
- Whirlpool Ice Maker Troubleshooting: 7 Problems & Fixes
- Whirlpool Ice Maker Not Working? Water Dispenser Works? Fix the Fill Tube
- Whirlpool Ice Maker Reset: When to Use It & When to Replace
- Whirlpool Ice Maker Leaking? 5 Causes & Fixes
- Whirlpool Ice Maker Frozen? 5 Causes & Fixes
- KitchenAid Ice Maker Reset: Fix Common Failures
- Most Reliable Ice Maker 2026: 5 Brands Ranked by Failure Rates
- Best Budget Ice Maker 2026: 5 Reliable Units Under $200
- GE Ice Maker Water Valve Replacement: $20 DIY Fix