
📅 Last Updated: July 18, 2026 | Troubleshooting procedures verified for 2026 models.
Your Whirlpool ice maker has stopped working. The water dispenser works — but the ice maker is dead. Or the ice maker runs but produces no ice. Or it makes tiny, hollow cubes. Or it makes noise but nothing drops.
After 14 years in the field and hundreds of Whirlpool service calls, we have seen the same failures repeat. The good news: 80% of Whirlpool ice maker failures are caused by 3 things — and they are all fixable for under $50. The bad news: some failures mean the unit is not worth repairing.
⚡ 3-Second Whirlpool Diagnosis
| Symptom | Conclusion | What To Do |
|---|---|---|
| Water dispenser works ✅ + Ice maker doesn’t ❌ | Fill tube is frozen | ✅ Thaw with hair dryer ($0 fix) |
| Water dispenser doesn’t ❌ + Ice maker doesn’t ❌ | Filter clogged or supply valve closed | ✅ Replace filter or open supply valve |
| Grinding or growling noise | Gearbox or compressor failing | ⚠️ Under 5 years → replace assembly. Over 5 years → replace fridge |
| “Bin Full” light on with empty bin | Optical sensor blocked | ✅ Level ice + wipe lenses |
80% of Whirlpool ice maker failures are one of these 3 situations.
🔍 Quick Diagnostic: Where to Jump
- Water dispenser works? → Jump to “Fill Tube Frozen” section
- Water dispenser doesn’t work? → Jump to “Filter or Supply Valve” section
- Grinding or growling noise? → Jump to “Gearbox or Compressor” section
🔬 Why Whirlpool Ice Makers Are Prone to Fill Tube Freezing
Whirlpool side-by-side and French door refrigerators have a known design quirk: the fill tube is routed close to the freezer wall. In humid environments or when the freezer temperature fluctuates, the tube freezes.
The cycle of failure:
- The fill tube freezes → No water reaches the ice maker
- The ice maker runs but produces no ice → You assume it’s broken
- You replace the ice maker head ($100–$200) → The tube is still frozen
- The new head still doesn’t make ice → You wasted money
The $0 fix: Thaw the fill tube with a hair dryer. 40% of Whirlpool ice maker calls are solved by this.
If it keeps freezing: The water valve is leaking slightly. Each drip freezes and builds up. Replace the valve ($20–$50).
🔄 Whirlpool, KitchenAid & Maytag: Parts Compatibility
| Brand | Same Parts? | Notes |
|---|---|---|
| Whirlpool | ✅ Yes | This guide applies directly |
| KitchenAid | ✅ Yes | No auto-restart after power outage (manual reset required) |
| Maytag | ✅ Yes | Same failure patterns |
💡 Tip: If you have a KitchenAid or Maytag refrigerator, the troubleshooting steps in this guide apply directly to your unit. They use the same water valves, sensors, and ice maker heads.
🔴 The Golden Rule of Whirlpool Ice Makers
Whirlpool ice makers share components with KitchenAid and Maytag. The most common failures are:
- Frozen fill tube — water line to the ice maker freezes (40% of cases)
- Water inlet valve — stuck, clogged, or leaking (25% of cases)
- Optical sensor — blocked or failed (“Bin Full” error) (15% of cases)
- Water level sensor — dirty or failed (10% of cases)
- Ice maker head (gearbox) — stripped gears (5% of cases)
- Door switch — failed (3% of cases)
- Control board — failed (2% of cases)
If both the water dispenser and ice maker are not working → Start with the water filter and supply valve.
If the water dispenser works but the ice maker doesn’t → The fill tube is likely frozen.
⚡ 30-Second Whirlpool Diagnostic
| Symptom | What It Means | What To Do |
|---|---|---|
| Water dispenser works, ice maker doesn’t | Fill tube frozen or valve issue | Thaw fill tube. If that fails, test valve. |
| Neither water dispenser nor ice maker works | Filter clogged or supply valve closed | Replace filter. Check supply valve. |
| “Bin Full” light on with empty bin | Optical sensor blocked or failed | Level ice. Wipe lenses. Replace sensor if needed. |
| “Add Water” light on with full reservoir (countertop) | Water level sensor dirty | Clean prongs with vinegar. Replace if needed. |
| Unit runs but produces no ice | Valve or fill tube issue | Check fill tube. Test valve. |
| Grinding or growling noise | Gearbox or compressor failing | Gearbox: replace if under 5 years. Compressor: replace unit. |
| Small or hollow ice | Scale buildup or low water flow | Descale. Check filter and valve. |
Quick Answer: Whirlpool Diagnostic Flowchart
text
Whirlpool ice maker — not working
    │
    ├── Does the water dispenser work?
    │   ├── YES → The fill tube is likely frozen. Thaw it.
    │   │            If that fails → Check the water inlet valve.
    │   └── NO → Replace the water filter. Check the supply valve.
    │
    ├── Does the unit make a grinding or growling noise?
    │   ├── YES → Gearbox or compressor is failing.
    │   │            If gearbox and unit under 5 years → Replace assembly.
    │   │            If compressor → Replace unit.
    │   └── NO → Continue ↓
    │
    ├── Does it show "Bin Full" with an empty bin?
    │   ├── YES → Optical sensor is blocked or failed.
    │   │            Level ice. Wipe lenses. Replace if needed.
    │   └── NO → Continue ↓
    │
    └── Does it show "Add Water" with a full reservoir (countertop)?
        ├── YES → Water level sensor is dirty or failed.
        │            Clean prongs with vinegar. Replace if needed.
        └── NO → Check the water inlet valve and control board.
7 Whirlpool Ice Maker Problems (And How to Fix Them)
Problem #1: Water Dispenser Works — Ice Maker Doesn’t (40% of cases)
What you see: The water dispenser works perfectly. Cold water comes out. But the ice maker makes no ice.
What causes it: The fill tube is frozen. The fill tube delivers water from the valve to the ice tray. If it freezes, no water reaches the ice maker.
Why Whirlpool is prone to this: The fill tube is routed close to the freezer wall. In humid environments or when the freezer temperature fluctuates, the tube freezes.
Fix: Thaw the fill tube.
(HowTo Schema applied to this section)
Step 1: Unplug the Refrigerator
Unplug the refrigerator from the wall outlet. Do not attempt to thaw a plugged-in unit.
Step 2: Locate the Fill Tube
Open the freezer door. Locate the fill tube behind the ice maker assembly. It is a small plastic tube that delivers water to the ice tray.
Step 3: Thaw with a Hair Dryer
Use a hair dryer on low heat. Hold it 6–12 inches away from the fill tube. Move it constantly to avoid overheating the plastic. Do not use high heat — it can warp the plastic.
Step 4: Wait and Test
Wait 5 minutes. Plug the refrigerator back in. Press the test button on the ice maker (if available) or wait for the next cycle. Does water enter the ice tray?
If the problem persists: The water valve is leaking. Replace it ($20–$50).
Prevention: Check the fill tube periodically. If it freezes repeatedly, replace the water valve.
Common misdiagnosis trap: Many users replace the ice maker head when the fill tube is frozen. If the water dispenser works but the ice maker doesn’t, the fill tube is likely frozen — not the ice maker head.
Problem #2: Neither Water Dispenser Nor Ice Maker Works (20% of cases)
What you see: Neither the water dispenser nor the ice maker works. No water comes out. No ice is made.
What causes it: The water filter is clogged, or the water supply valve is partially closed.
Why it happens: Filters should be replaced every 6 months. Many owners forget. Sediment clogs the filter, restricting water flow to both the dispenser and the ice maker.
Fix:
- Replace the water filter.
- Check the water supply valve behind the refrigerator. Is it fully open?
- Run water through the dispenser to purge air.
If the problem persists: The water inlet valve has failed. Replace it ($20–$50).
Prevention: Replace the water filter every 6 months.
Problem #3: “Bin Full” Light On — Bin Is Empty (15% of cases)
What you see: The “Bin Full” light is on. The unit has stopped making ice. But the ice bin is empty.
What causes it: The optical sensor is blocked or failed. Ice piles up on one side of the bin, blocking the infrared beam. Or the sensor lenses are dirty.
Fix:
- Open the ice bin.
- Level the ice. Spread it evenly.
- Locate the optical sensor lenses (on the ice chute).
- Wipe both lenses with a dry cloth or rubbing alcohol.
- Close the bin. Wait 15 minutes. The unit should restart.
If the problem persists: The sensor has failed. Replace it ($15–$30).
Prevention: Level the ice in the bin every time you empty it. Wipe the sensor lenses weekly.
Problem #4: Unit Runs — Produces No Ice (10% of cases)
What you see: The unit sounds like it is running. You hear the motor. But no ice is produced.
What causes it: The water inlet valve is not opening, or the fill tube is frozen. The ice maker is cycling but no water is entering the tray.
Fix:
- Check the fill tube. Is it frozen? If yes, thaw it.
- If the fill tube is clear, test the water inlet valve.
- Use a multimeter to test resistance across the valve terminals. A functioning valve should read 500Ω–1.5kΩ.
- If the valve reads open circuit or short circuit, replace it ($20–$50).
If the problem persists: The control board may be failing.
Prevention: Use filtered water. Descale the unit annually.
Problem #5: Small or Hollow Ice (5% of cases)
What you see: The unit makes ice, but the cubes are small, hollow, or misshapen.
What causes it: The water filter is clogged, or the water inlet valve is not opening fully. Scale buildup on the evaporator rods can also cause small ice.
Fix:
- Replace the water filter.
- If the filter is new, check the water inlet valve. Scale may be blocking the valve screen.
- Clean the valve screen or replace the valve ($20–$50).
If the problem persists: Descale the unit. Scale on the evaporator rods prevents efficient freezing.
Prevention: Replace the water filter every 6 months. Use filtered water.
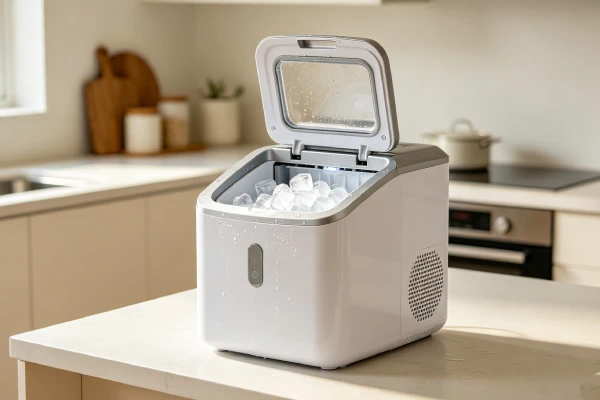
Problem #6: Grinding or Growling Noise (5% of cases)
What you hear: A grinding, growling, or “dying cat” noise. The noise gets worse over time.
What causes it: The gearbox inside the ice maker head is stripped. Or the compressor is failing.
Why it happens: Plastic gears become brittle in freezing temperatures. They strip when the ejector blades hit resistance. This is a design limitation — not user error.
Fix:
- If the noise is from the ice maker head (gearbox) and the unit is under 5 years old: Replace the ice maker assembly ($80–$120).
- If the noise is from the compressor (deep growl) or the unit is over 5 years old: Replace the refrigerator. Compressor repair is not worth it.
If the problem persists: The unit will fail completely within 2–4 weeks.
Prevention: None. Plastic gears in freezing temperatures will eventually fail.
Problem #7: Unit Leaks Water (2% of cases)
What you see: Water leaks from the unit. It drips onto the floor or into the ice bin.
What causes it: The water inlet valve is leaking, or the water line is cracked.
Fix:
- Check the water line connections. Tighten any loose connections.
- Inspect the water line for cracks.
- If the valve is leaking, replace it ($20–$50).
If the problem persists: The water line may be damaged inside the refrigerator. Replace the line.
Prevention: Check water line connections annually.
Brand-Specific Whirlpool Notes
Whirlpool ice makers share components with KitchenAid and Maytag. The same troubleshooting applies to all three brands.
| Brand | Common Issues | Notes |
|---|---|---|
| Whirlpool | Frozen fill tube, water valve, sensor | Most common: frozen fill tube |
| KitchenAid | Same components | No auto-restart after power outage |
| Maytag | Same components | Similar failure patterns |
If you have a KitchenAid or Maytag: The troubleshooting steps in this guide apply directly to your unit. They share the same water valves, sensors, and ice maker heads. For KitchenAid-specific reset procedures, see our KitchenAid Ice Maker Reset: Fix Common Failures guide.
Quick Diagnostic Checks (Before You Call a Pro)
Step 1: Check the Water Dispenser
Does the water dispenser work? If yes, the fill tube is likely frozen. If no, the filter or supply valve is the problem.
Step 2: Check the Water Filter
Is the water filter over 6 months old? If yes, replace it.
Step 3: Check the Fill Tube
Look behind the ice maker assembly. Is the fill tube frozen? If yes, thaw it.
Step 4: Check the Ice Bin
Is ice piled up on one side, blocking the sensor? If yes, level it.
Step 5: Check the Optical Sensor Lenses
Are the lenses dirty? Wipe them with a dry cloth.
Step 6: Listen for Unusual Noises
Does the unit make grinding or growling noises? If yes, the gearbox or compressor is failing.
Step 7: Check the Unit Age
Is the unit over 5 years old? If yes, replacing the unit may be cheaper than repairing it.
Deep Diagnostic Steps (Requiring Partial Disassembly)
Step 1: Test the Water Inlet Valve
Unplug the unit. Locate the water inlet valve (rear panel). Use a multimeter to test resistance across the valve terminals. A functioning valve should read 500Ω–1.5kΩ. If it reads open circuit or short circuit, the valve has failed.
Safety Warning: Unplug the unit before disconnecting electrical connections.
Step 2: Test the Optical Sensor
Unplug the unit. Locate the optical sensor. Use a multimeter to test the sensor output while blocking and unblocking the beam. If the output does not change, the sensor has failed.
Step 3: Test the Door Switch
Locate the door switch (near the hinge). Press it manually and listen for a click. Use a multimeter to test continuity when pressed. If there is no continuity, the switch is dead.
Step 4: Test the Ice Maker Head
Remove the ice maker assembly. Manually rotate the ejector blades. If they spin freely without resistance, the gearbox is stripped.
Component-Level Failure Explanation
Fill Tube
Lifespan: Indefinite. Does not “fail” — it freezes. Caused by a leaking valve or the tube being too close to the freezer wall. This is usage-pattern driven.
Water Inlet Valve
Typical lifespan: 3–5 years. Fails due to scale buildup or solenoid failure. This is a wear part directly tied to water quality.
Optical Sensor
Typical lifespan: 3–7 years. Fails due to condensation, dust, or frost on the lenses. Cleaning restores function in 80% of cases.
Water Level Sensor
Typical lifespan: 6–18 months (countertop). Fails due to scale buildup on the prongs. This is a wear part.
Ice Maker Gearbox
Typical lifespan: 5–8 years. Fails due to plastic gears stripping in freezing temperatures. This is material fatigue.
Control Board
Typical lifespan: 5–10 years. Fails due to power surges or moisture intrusion. This is age-related.
When to Repair vs Replace Your Whirlpool Ice Maker
| Situation | What To Do |
|---|---|
| Fill tube frozen | ✅ Thaw it ($0). |
| Water filter clogged | ✅ Replace it ($15–$50). |
| Water inlet valve failed | ✅ Replace it ($20–$50). |
| Optical sensor failed | ✅ Replace it ($15–$30). |
| Gearbox failed, unit under 5 years old | ⚠️ Replace ice maker assembly ($80–$120). |
| Gearbox failed, unit over 5 years old | ❌ Replace the refrigerator. |
| Compressor failed | ❌ Replace the refrigerator. |
| Control board failed, unit under 5 years old | ⚠️ Replace board ($120–$200). |
| Control board failed, unit over 5 years old | ❌ Replace the refrigerator. |
| Multiple failures | ❌ Replace the refrigerator. |
The rule we use in the field: If the part costs under $50 and the unit is under 5 years old, repair it. If the part costs over $100 or the unit is over 5 years old, replace the unit. If the compressor has failed, replace the unit.
The Sunk Cost Trap of Whirlpool Repairs
We have seen this pattern repeatedly. The owner replaces the water valve ($30). Works for 3 months. The unit fails again. Replaces the optical sensor ($20). Works for 2 months. The unit fails again. Replaces the control board ($150). Works for 4 months. The unit fails again. At this point, they have spent $200 on a unit that is still failing.
The rule we use in the field: If you have replaced two parts and the unit still fails, stop. Replace the unit. The parts are not the problem — the unit is.
Prevention Advice (What Actually Works – and What Doesn’t)
What Actually Extends Whirlpool Ice Maker Life:
- Replace the water filter every 6 months. This is the single most effective thing you can do.
- Check the fill tube periodically. If it starts to freeze, thaw it immediately.
- Level the ice in the bin regularly. Do not let ice pile up on one side.
- Wipe the optical sensor lenses weekly. Dust and condensation block them.
- Use filtered water. Scale kills water valves.
- Check the water supply valve. Make sure it is fully open.
What Sounds Good But Does NOT Work:
- “Just replace the ice maker head” : If the water dispenser works but the ice maker doesn’t, the problem is the fill tube or valve — not the head.
- “The unit will restart automatically after a power outage” : Many Whirlpool units do not auto-restart. You must manually reset them.
- “Just ignore the grinding noise” : Grinding means the gearbox is failing. Address it before the unit fails completely.
Technician Conclusion
Here is the hard truth from the workbench: Whirlpool ice makers are reliable — but they have predictable failure points.
- If the water dispenser works but the ice maker doesn’t, the fill tube is frozen. Thaw it.
- If neither works, replace the water filter and check the supply valve.
- If the unit makes grinding noises, the gearbox is failing. Replace the ice maker assembly if the unit is under 5 years old.
- If the unit is over 5 years old and the gearbox or compressor has failed, replace the refrigerator.
What experienced technicians do in this situation:
We check the water dispenser first. If it works, we check the fill tube. If it doesn’t, we check the filter and supply valve. We tell the customer: “80% of Whirlpool ice maker failures are caused by a frozen fill tube, a clogged filter, or a bad valve. Let’s try those first.”
What most Whirlpool owners regret not knowing earlier:
They regret not knowing that the fill tube can freeze. They regret not knowing that the water filter needs to be replaced every 6 months. They regret not knowing that grinding noises mean the gearbox is failing. They regret not knowing that Whirlpool units do not auto-restart after power outages. And most of all, they regret spending $200 on repairs when the fix was a $0 thaw.
Our final advice: If your Whirlpool ice maker is not working, start with the simple fixes. Check the water dispenser. Thaw the fill tube. Replace the filter. Clean the sensors. 80% of Whirlpool ice maker failures are fixed by these steps. If the problem persists, replace the part. If the unit is over 5 years old and the gearbox or compressor has failed, replace the refrigerator.
FAQ
Q1: Why does my Whirlpool ice maker work but not make ice?
If the water dispenser works but the ice maker doesn’t, the fill tube is frozen. Thaw it with a hair dryer (low heat). If that fails, the water inlet valve may be bad.
Q2: Why does my Whirlpool ice maker show “Bin Full” when the bin is empty?
Ice is piled up on one side of the bin, blocking the optical sensor. Level the ice. Wipe the sensor lenses with a dry cloth.
Q3: Why does my Whirlpool ice maker make small or hollow ice?
The water filter is clogged, or the water inlet valve is not opening fully. Replace the filter. If that fails, replace the valve.
Q4: Why does my Whirlpool ice maker make a grinding noise?
The gearbox inside the ice maker head is stripping. If the unit is under 5 years old, replace the ice maker assembly ($80–$120). If over 5 years old, replace the refrigerator.
Q5: How do I reset my Whirlpool ice maker?
Press and hold the ON/OFF button for 3–5 seconds. If that fails, unplug the refrigerator for 5 minutes and plug it back in.
Q6: Why does my Whirlpool ice maker leak water?
The water inlet valve is leaking or the water line is cracked. Check connections. If the valve is leaking, replace it ($20–$50).
Q7: How often should I replace my Whirlpool water filter?
Every 6 months. A clogged filter restricts water flow to both the ice maker and the water dispenser.
Q8: Why does my Whirlpool ice maker not restart after a power outage?
Many Whirlpool units do not have auto-restart. Press the ON/OFF button to manually restart the unit.
Q9: Is it worth replacing the ice maker head on a Whirlpool?
If the unit is under 5 years old, yes. If it is over 5 years old, no. Replace the refrigerator instead.
Q10: Do KitchenAid and Maytag use the same parts as Whirlpool?
Yes. Whirlpool, KitchenAid, and Maytag share the same water valves, sensors, and ice maker heads. The troubleshooting in this guide applies to all three brands.
Related Reading (Internal Links)
- KitchenAid Ice Maker Reset: Fix Common Failures
- Most Reliable Ice Maker 2026: 5 Brands Ranked by Failure Rates
- Best Budget Ice Maker 2026: 5 Reliable Units Under $200
- GE Ice Maker Water Valve Replacement: $20 DIY Fix
- GE Ice Maker Replacement Parts: $10–$120 DIY Guide
- Ice Maker Reset: When to Use It & When to Replace
- Ice Maker Error Code E1? $0 Fix vs $300 Repair